How to build/edit website at Website Builder?
Just pop your question below to get an answer.
How to build/edit website at Website Builder?
When building your new website with the Bodygraph Website Builder, you can choose between two approaches:
Select ready made template and edit it (more templates will be launched this year) or start from scratch.
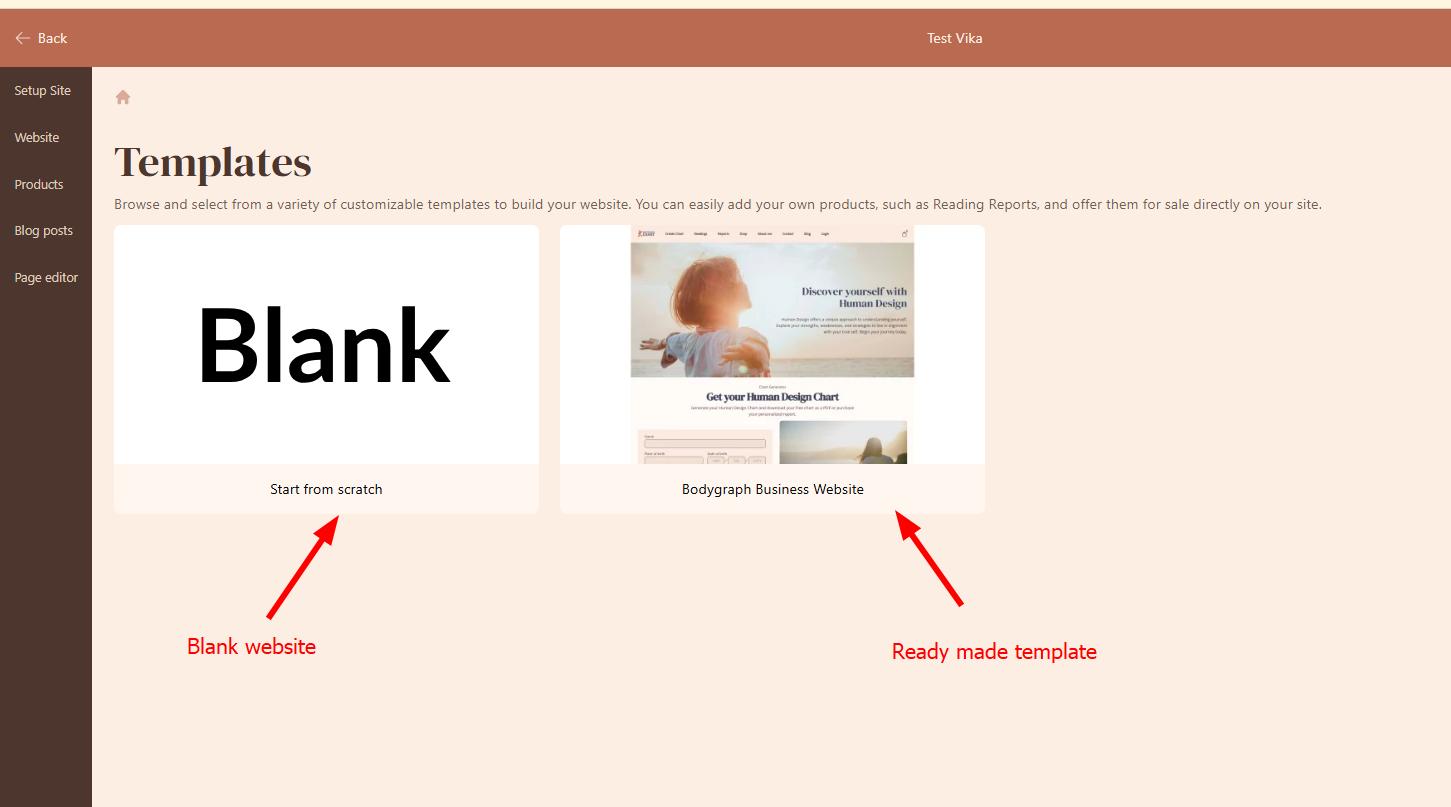
Whichever method you choose, the settings and editor navigation will remain the same.
So let’s have a look at the websites editor and what it has to offer. We will start with Setup and Editor sidebar tools and explanation what each of them do.
Website setup settings
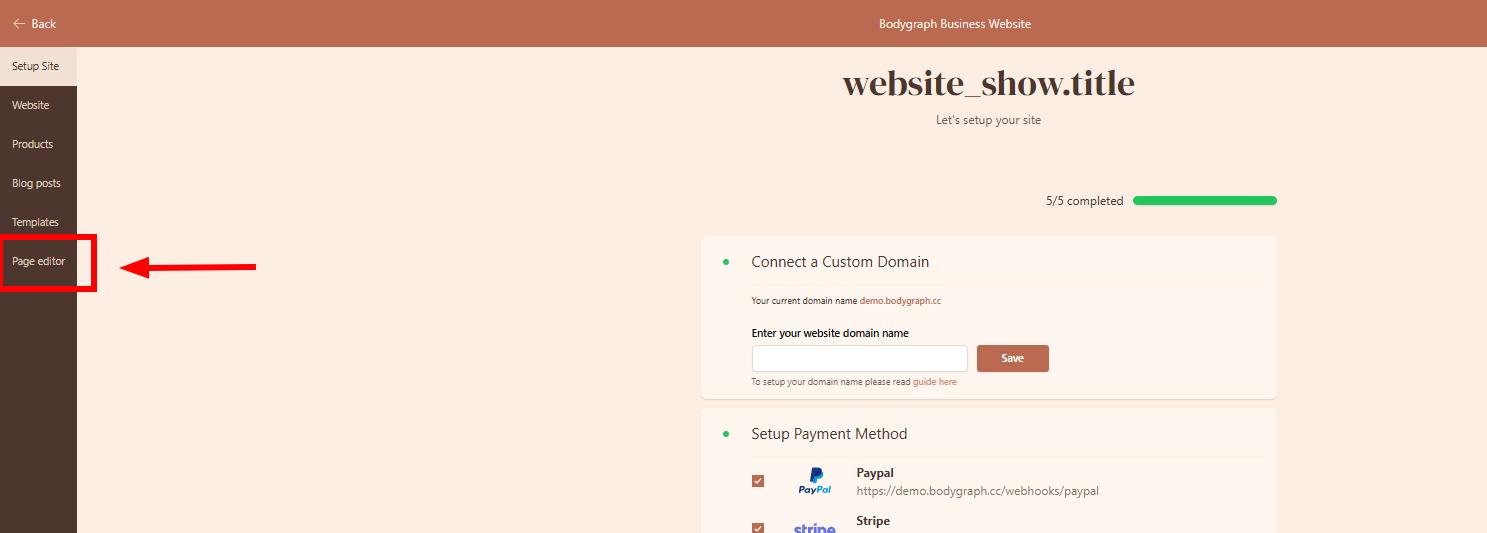
Setup settings includes Setup guide, Website settings, Products listing, Blog listing and Page editor options.
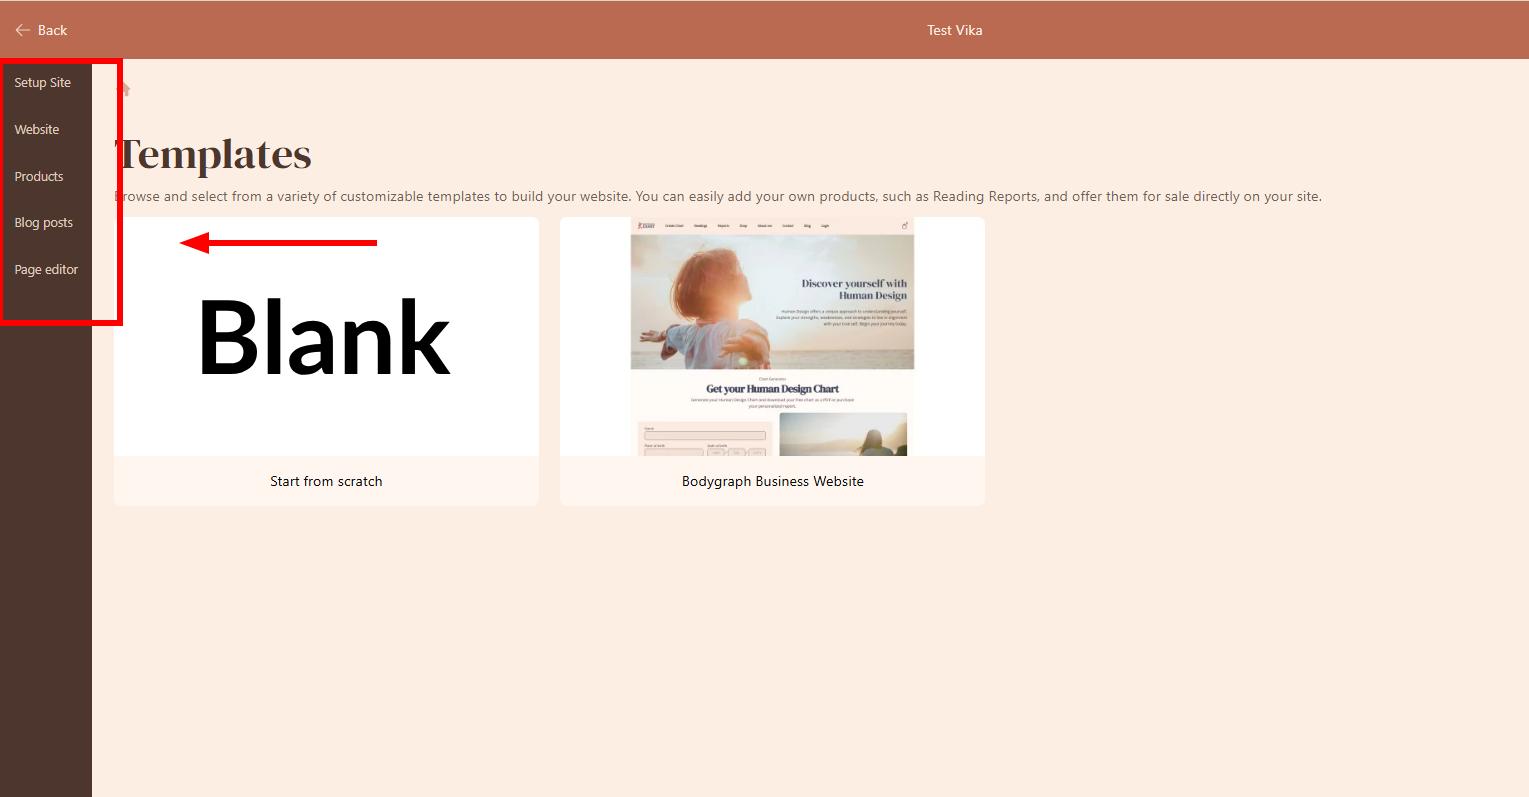
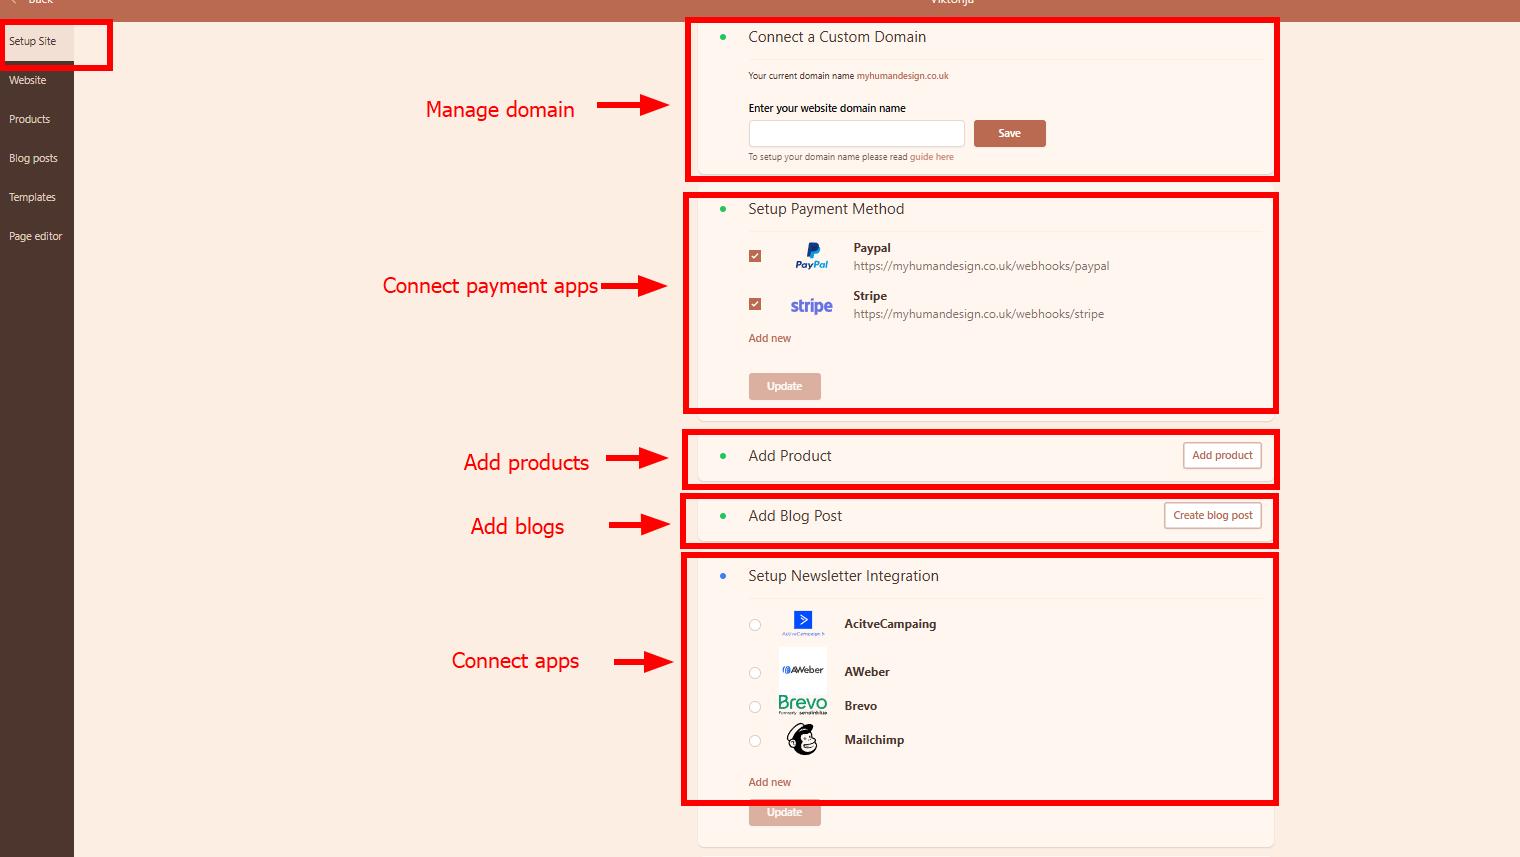
Setup guide helps you to link your private domain, connect very important apps and quickly upload any products/blogs listings.
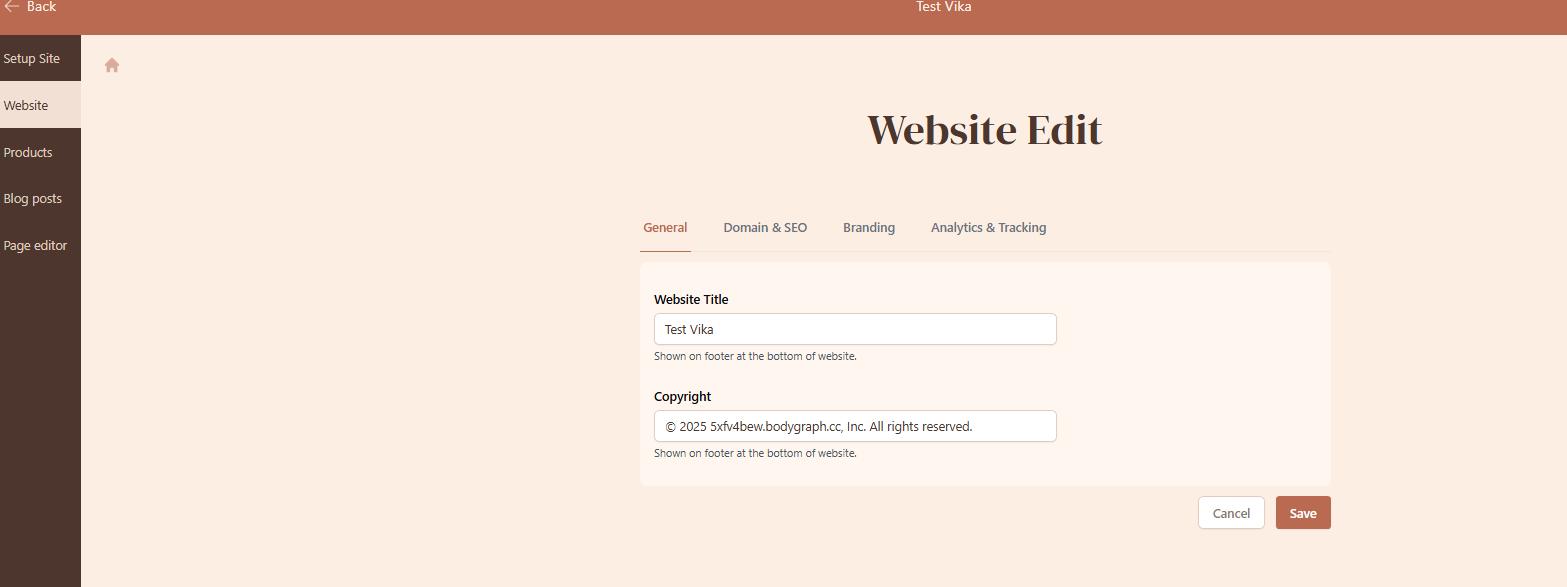
Website settings allows you to:
– Edit website name.
– Apply copyright text for all pages
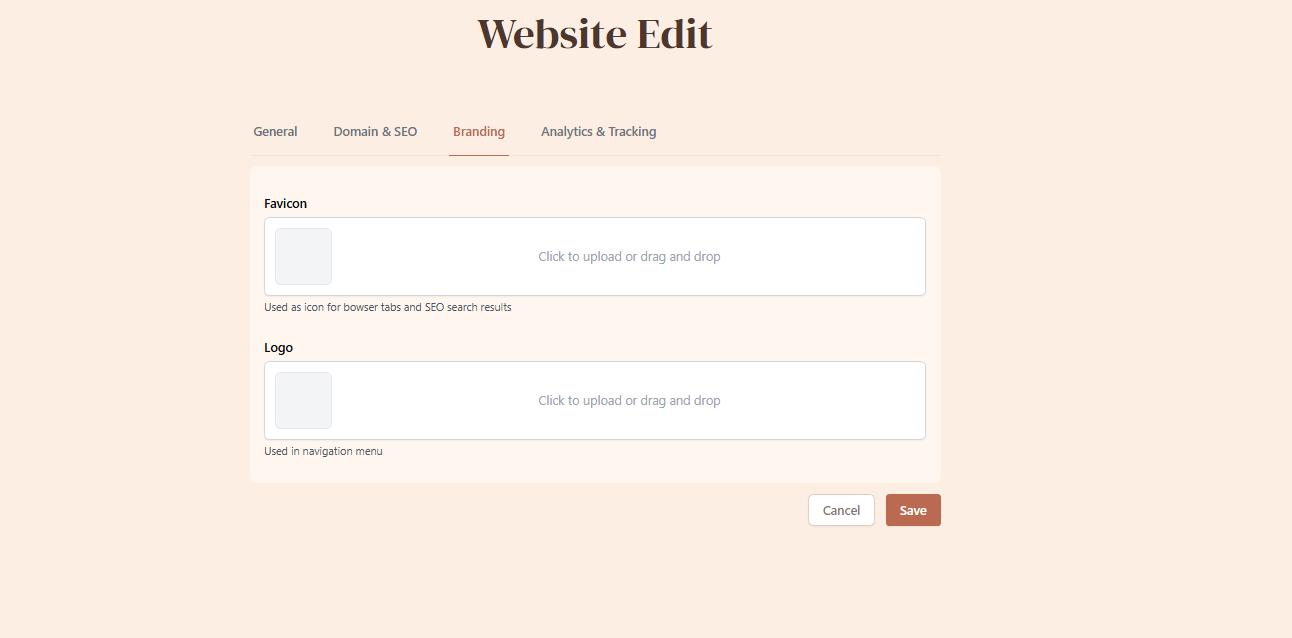
– Upload your Favicon and Logo
– Add analytics link

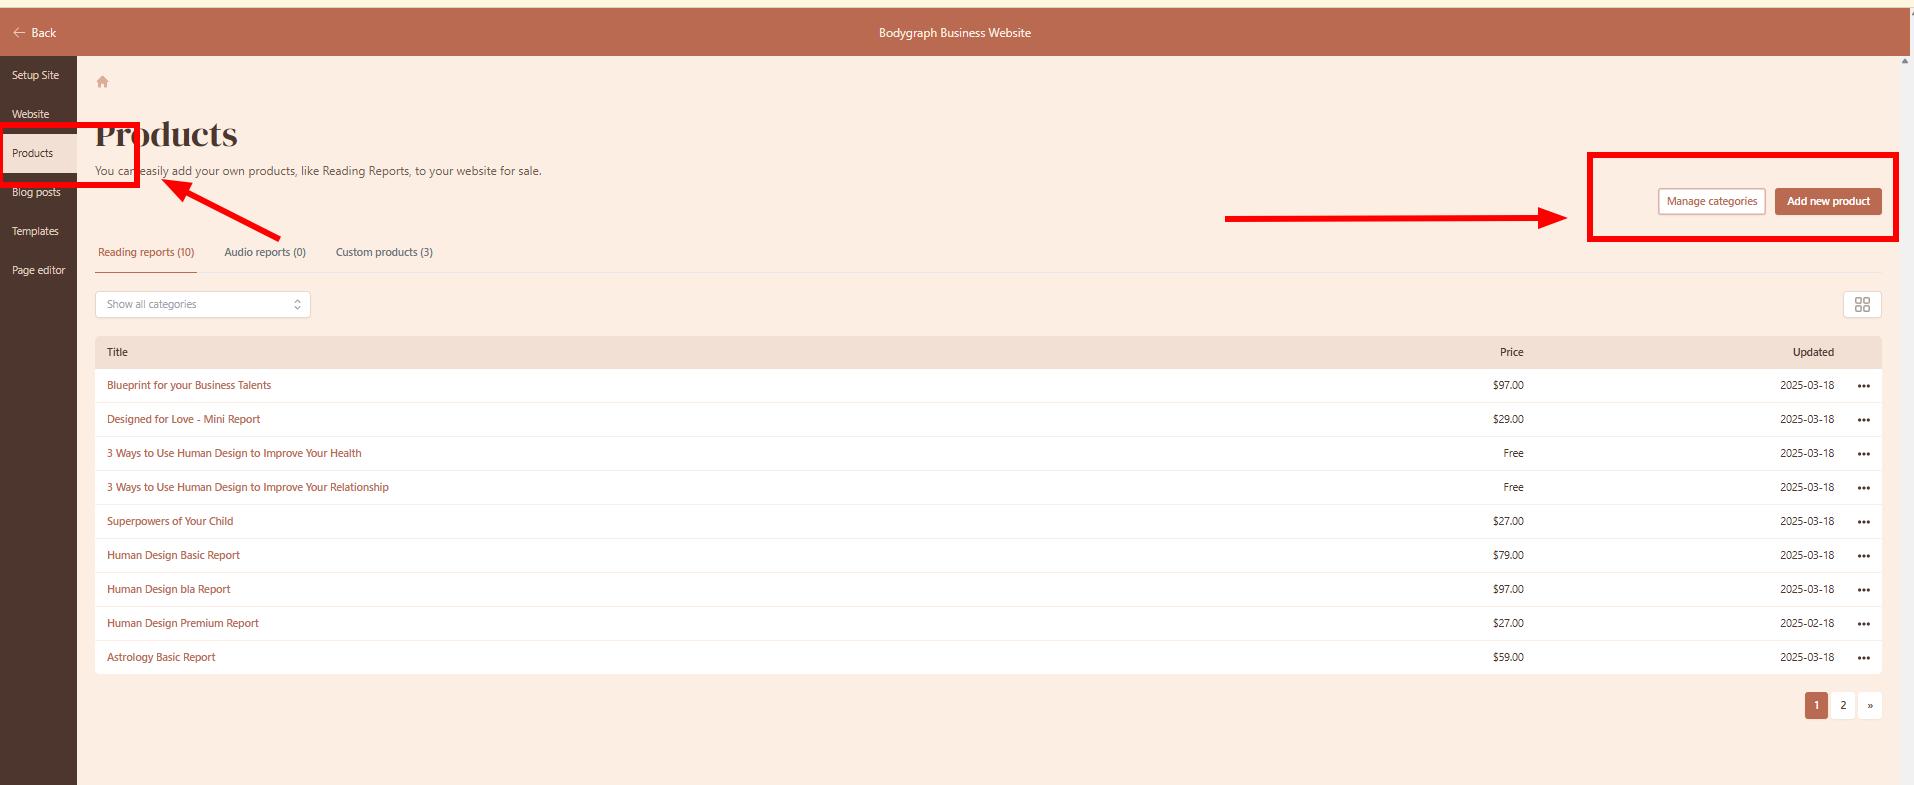
Product listing menu allows you to manage product listings, change product listing order (drag and drop) and group them into categories. Categories will be important when you want to link specific category to Product listing section at the website editor (will be explained later at this article).
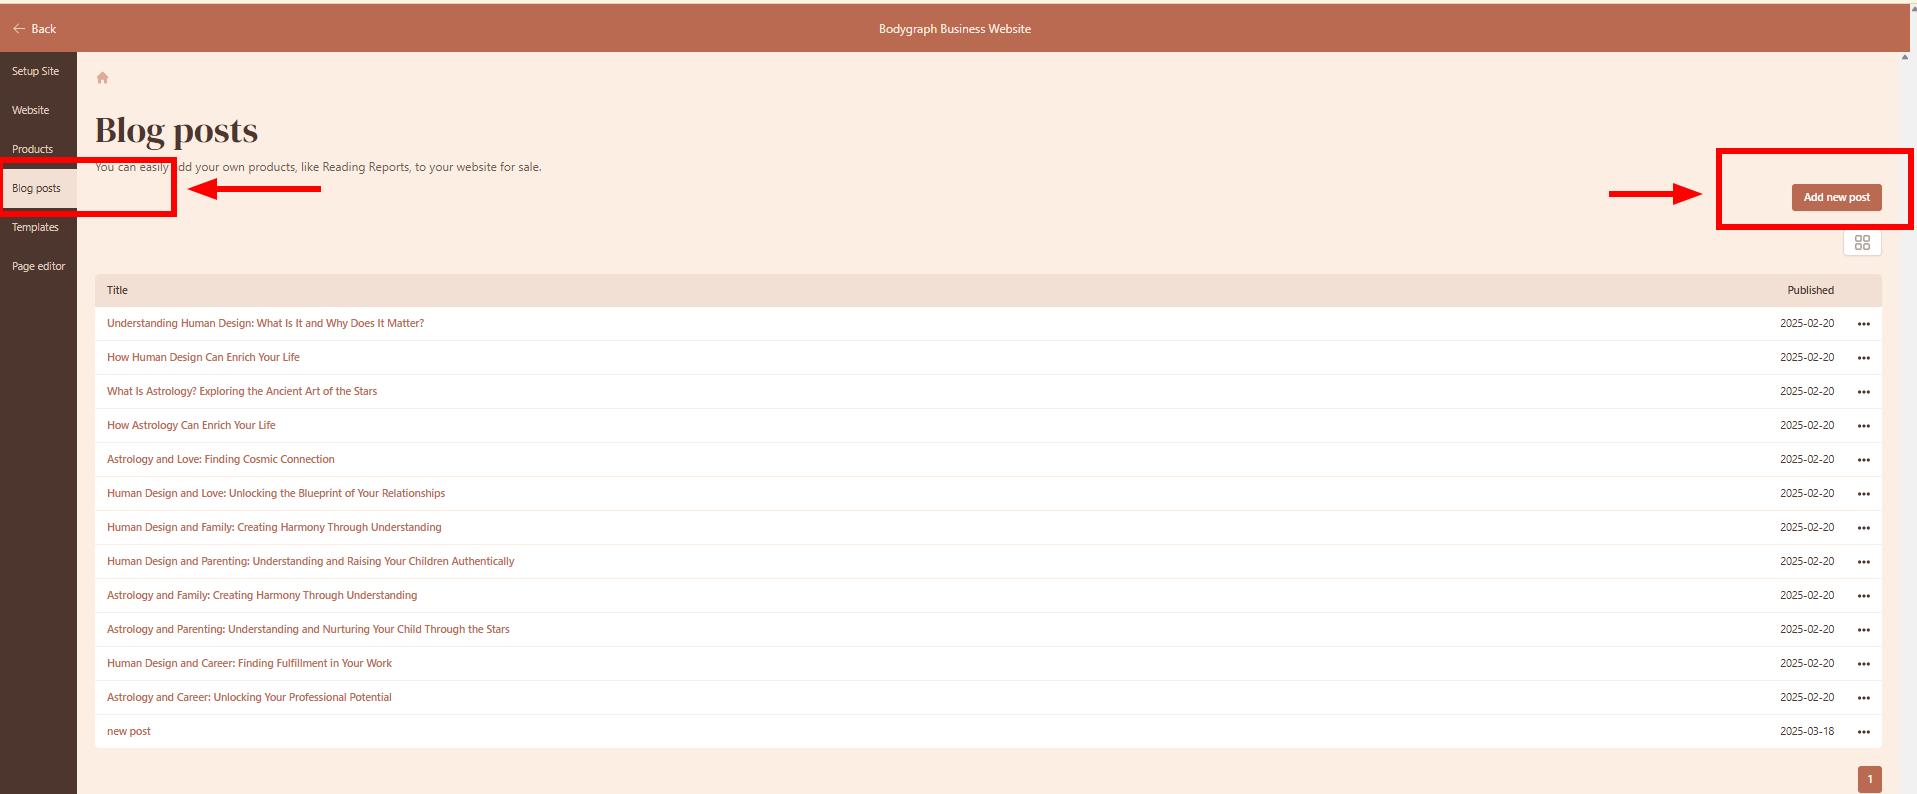
Blog listing allows you to upload/create your blogs if you plan to include Blog section to your website.
And finally we are moving to the page editor that includes new set of tools and settings.
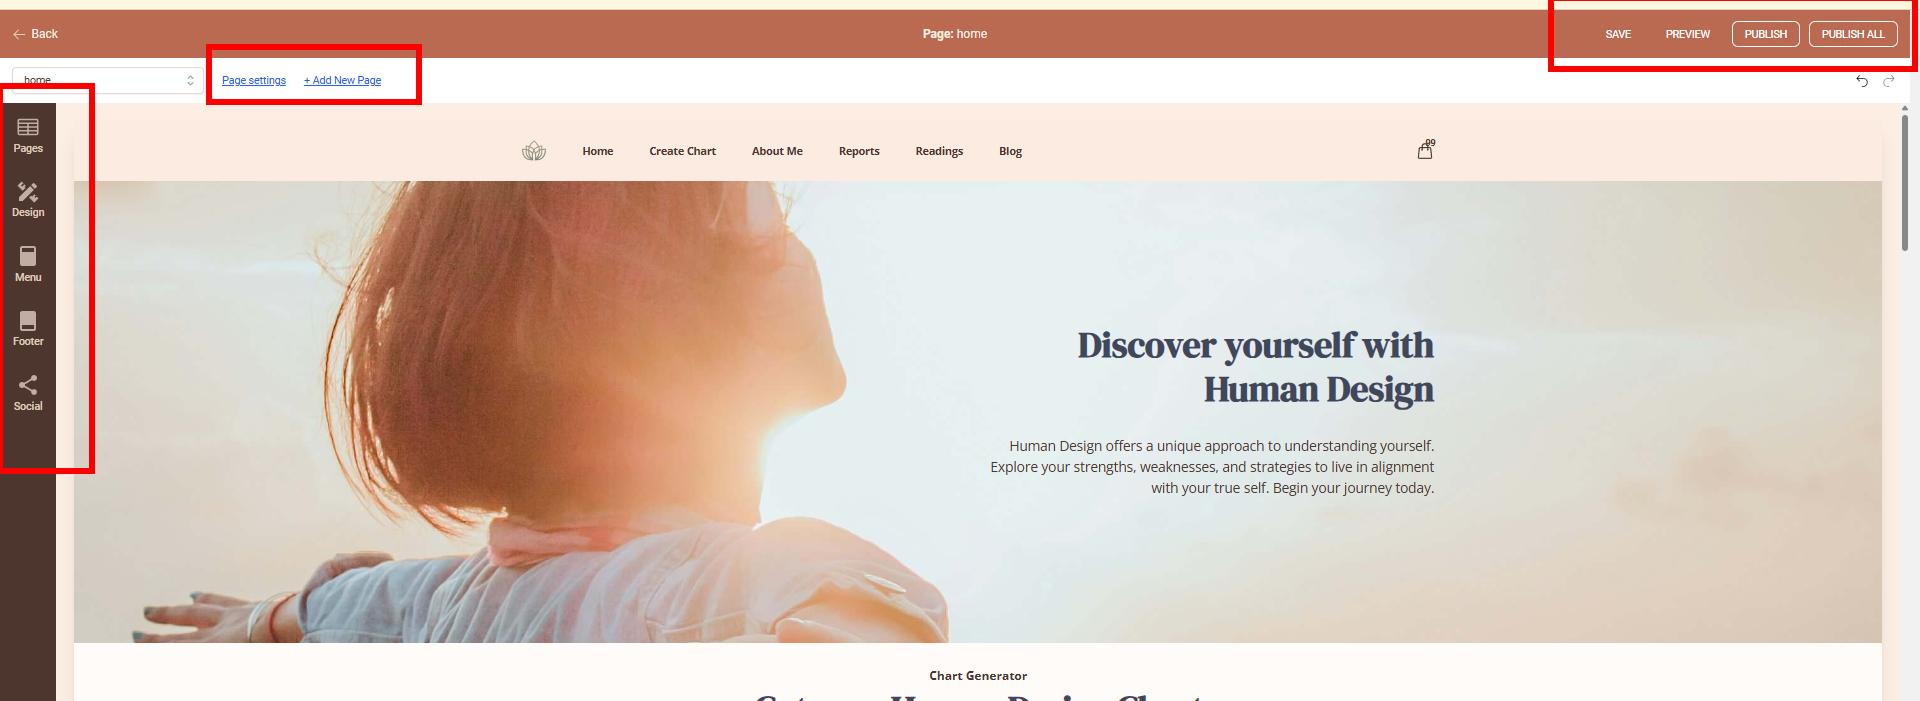
Website Editor Settings
Each tool/button provides different settings that apply changes for the website. However each section of the website will have it’s own settings for example to change image, change background color, attach product category. etc.
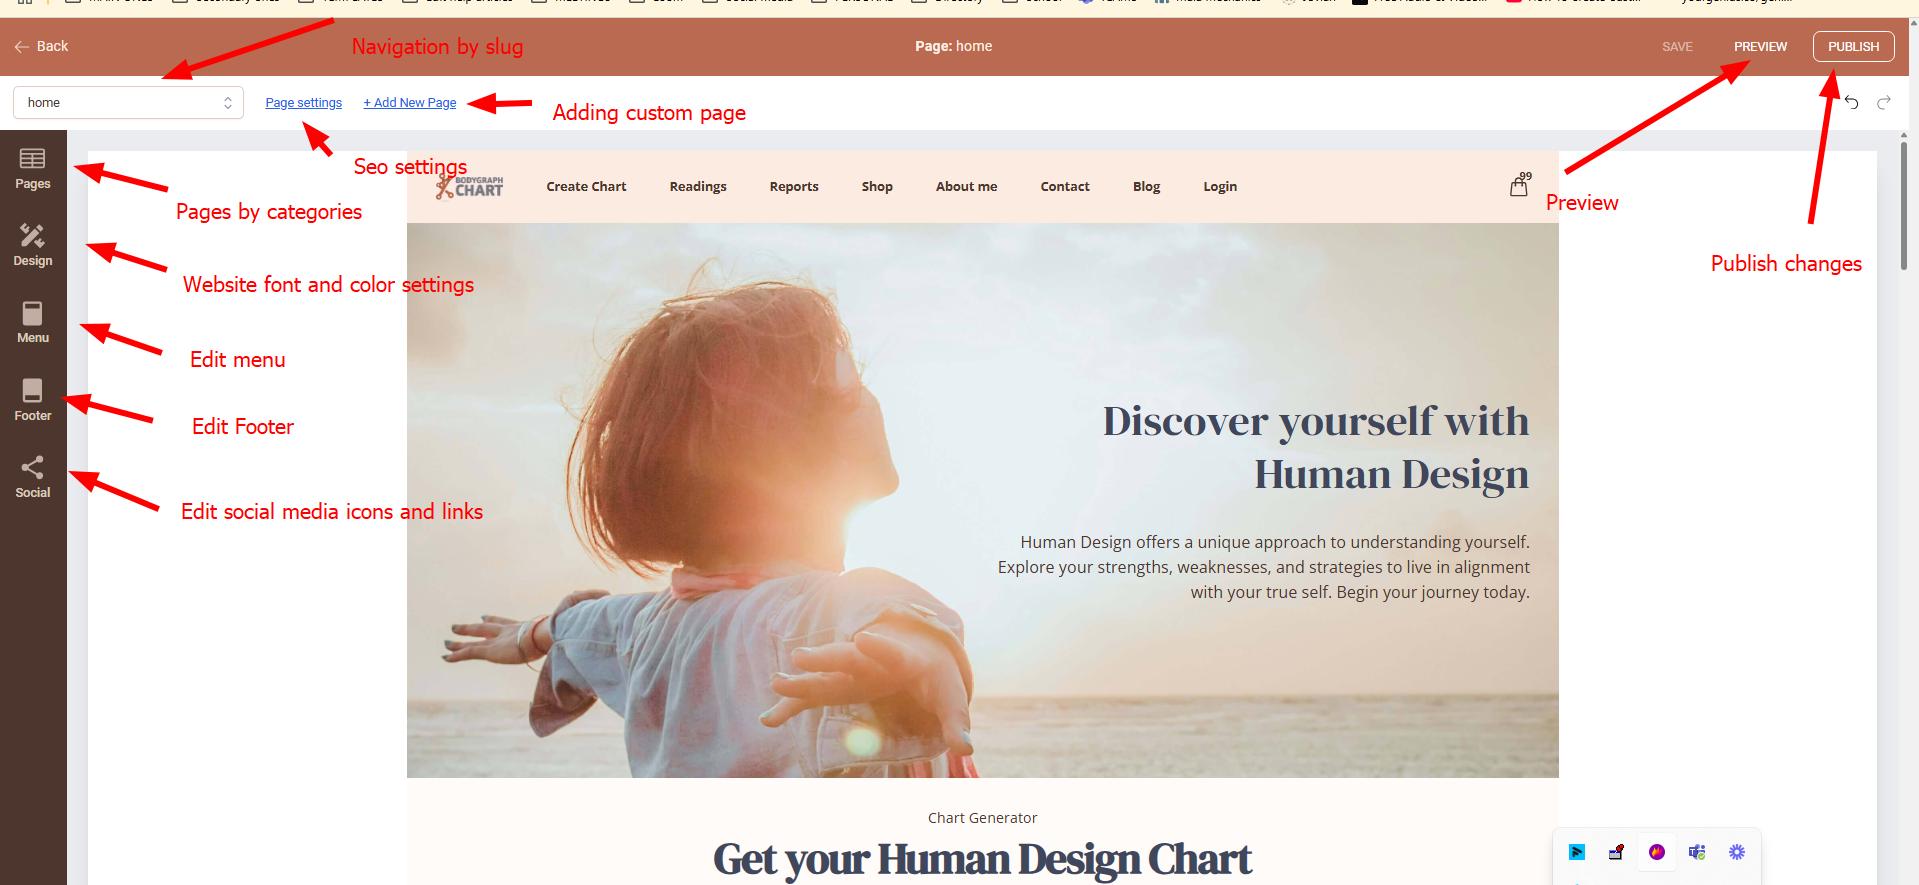
– Navigation includes quick page access via dropdown or going through categorized Pages menu.
– Page settings allow you to add SEO title, description and image to each page.
– Design settings allow you to control colors, fonts, width of the entire website.
– Menu allows you to manage which pages are live on the websites Menu.
– Footer settings allows to add pages listings, e.g. Terms and conditions.
– Social settings allows you to link your social media if you will include sections that holds social media icons.
– Publish button publishes all most recent changes on the website
– Changes are autosaved every 15 seconds or you can press Save button instead.
Individual Section settings
When it comes to each section settings, you will be able to click directly on the section and change background (individual background that will override setting from Design settings), images, etc.
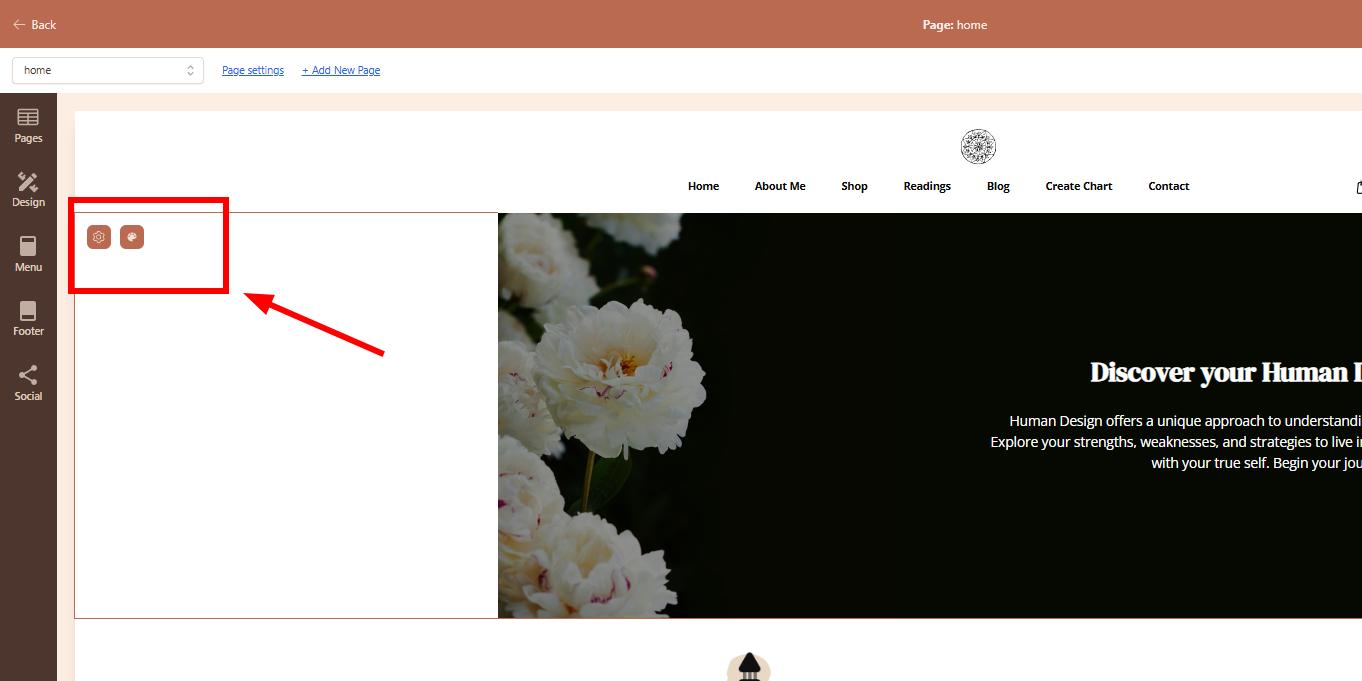
When section includes image (not as background) then you can click directly on the image and replace it.

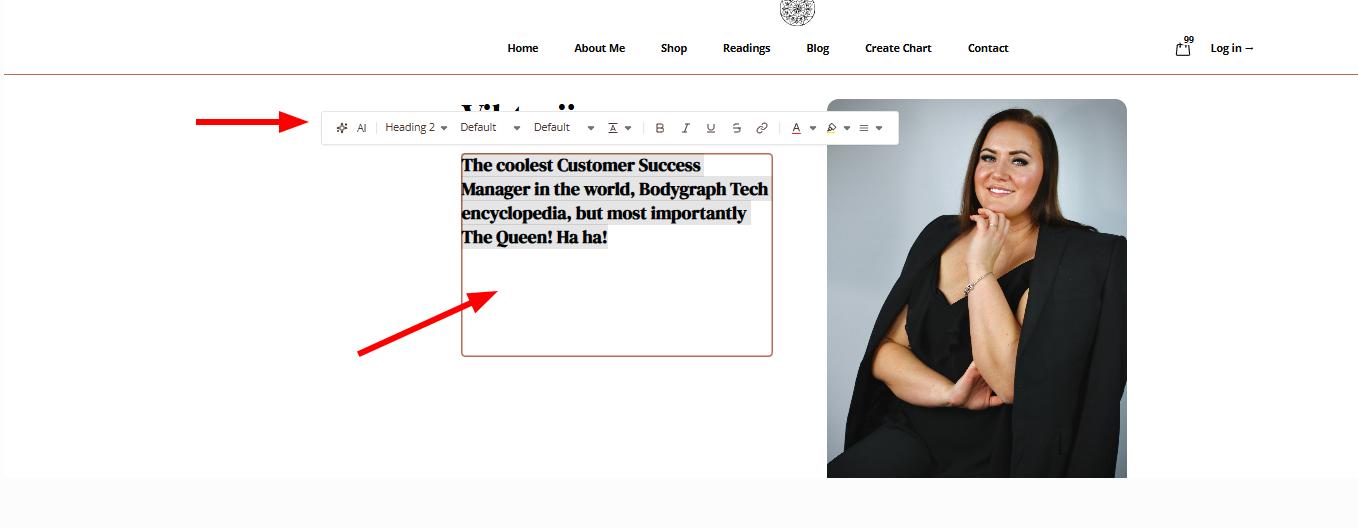
Same applies for any text fields where you can click on it and make changes. Also, menu pops up to change font, alignment, color of the text, add links and even use AI assistant to make quick translations, change tone, extend content, etc.
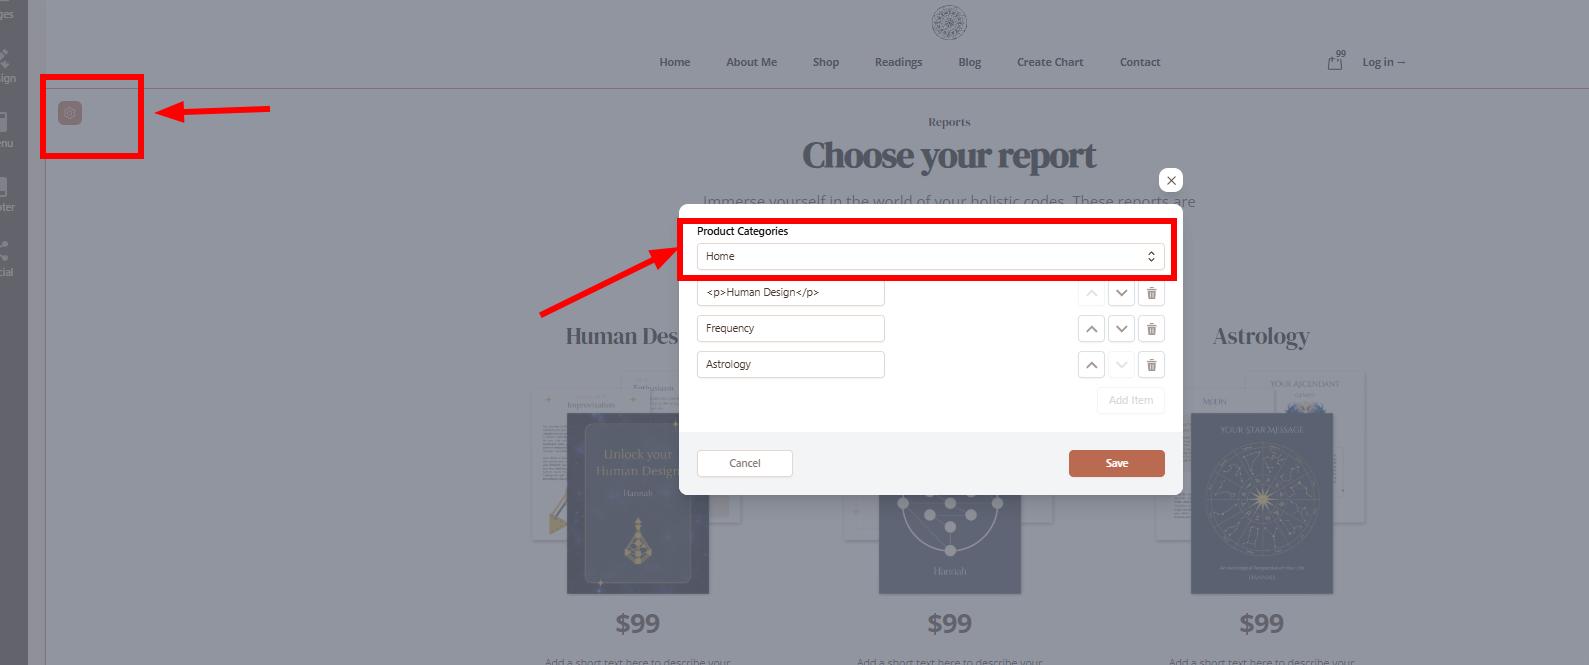
But most important section settings applies for Product listing section where you would need to attach the category to make sure the listing picks up the products from your Products listing. This will pick up titles, descriptions Thumbnails and other details that are linked to each product at the Product listing.
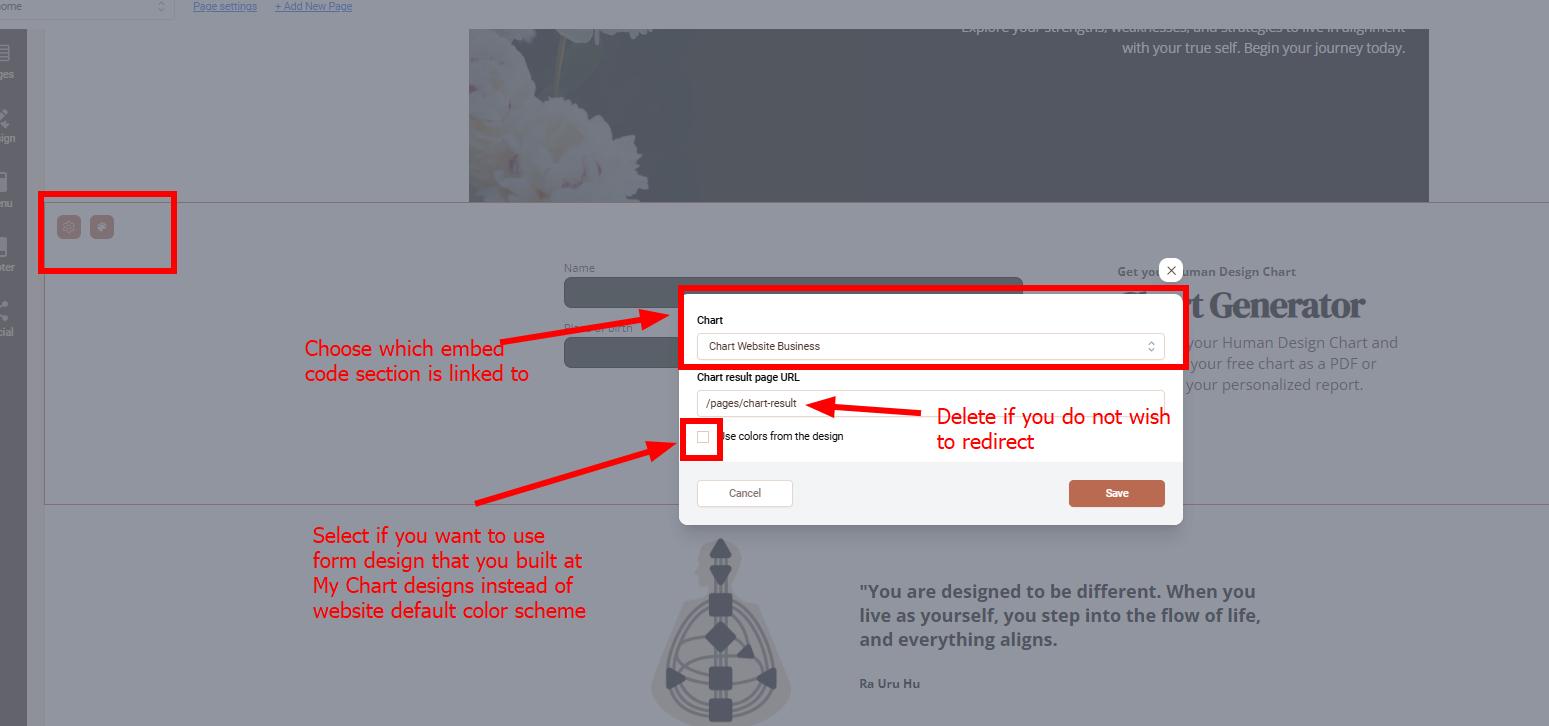
And other important settings applies to the chart integration sections where you must to choose which embed code this section will be linked to, whether you want chart to redirect or not and if you want to use website colors for the form or design that you built at My Chart Designs tool.
Each page of the website is being built form ready-made (mobile view adaptive) sections. You can add, duplicate, delete and rearrange settings by pressing on plus button or any section and selecting section that you wish to add.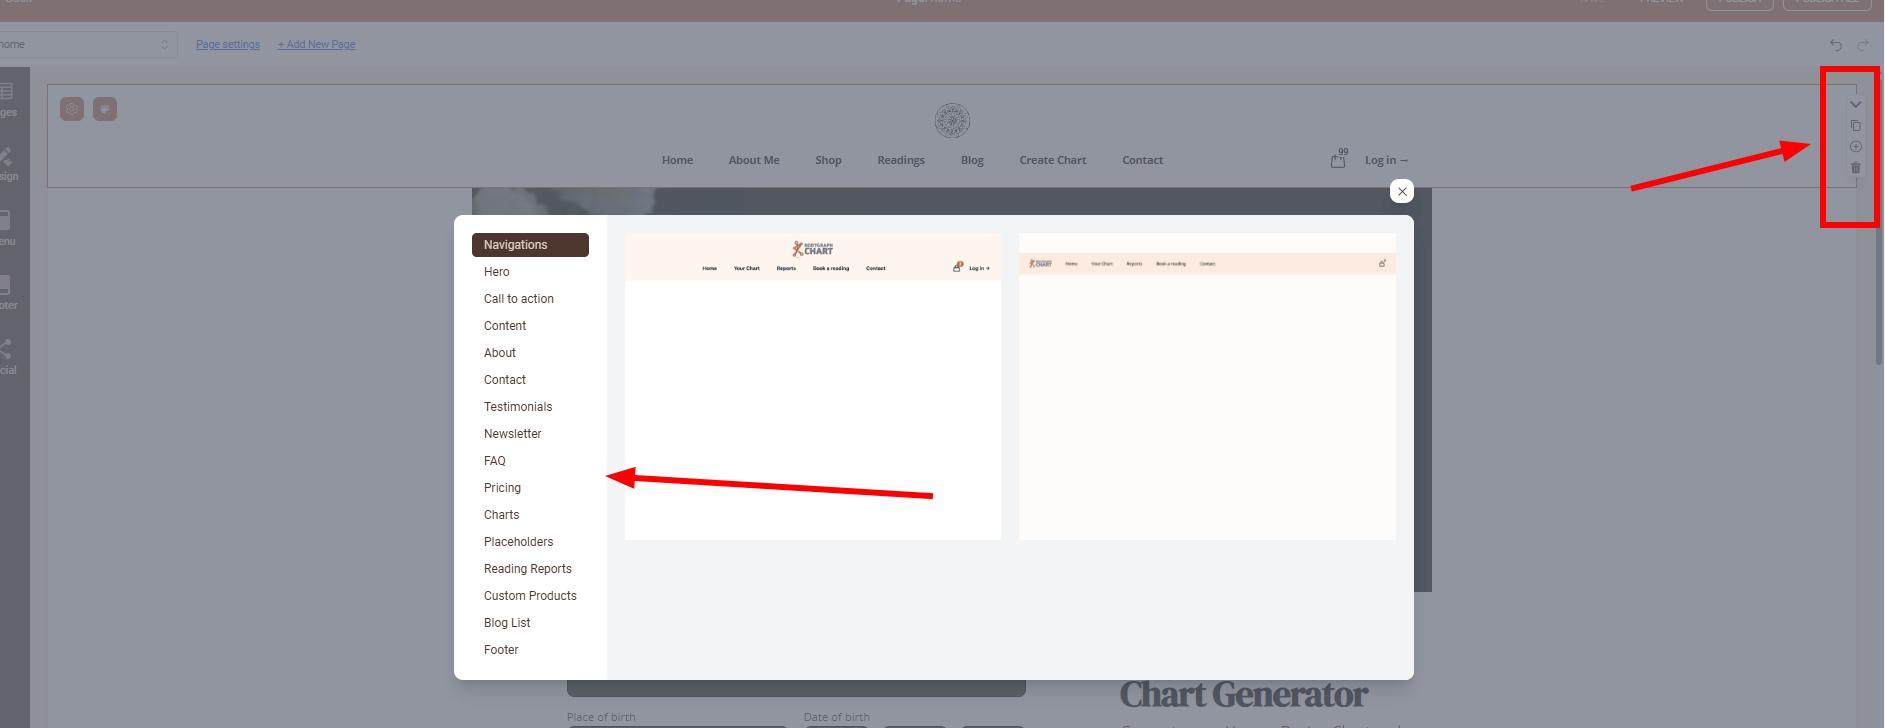
This list will be continuously updated over time, providing a wider selection of sections. However, please note that custom sections cannot be added, nor is there an option for a freestyle layout where elements can be moved within a section.
Emails and website notifications
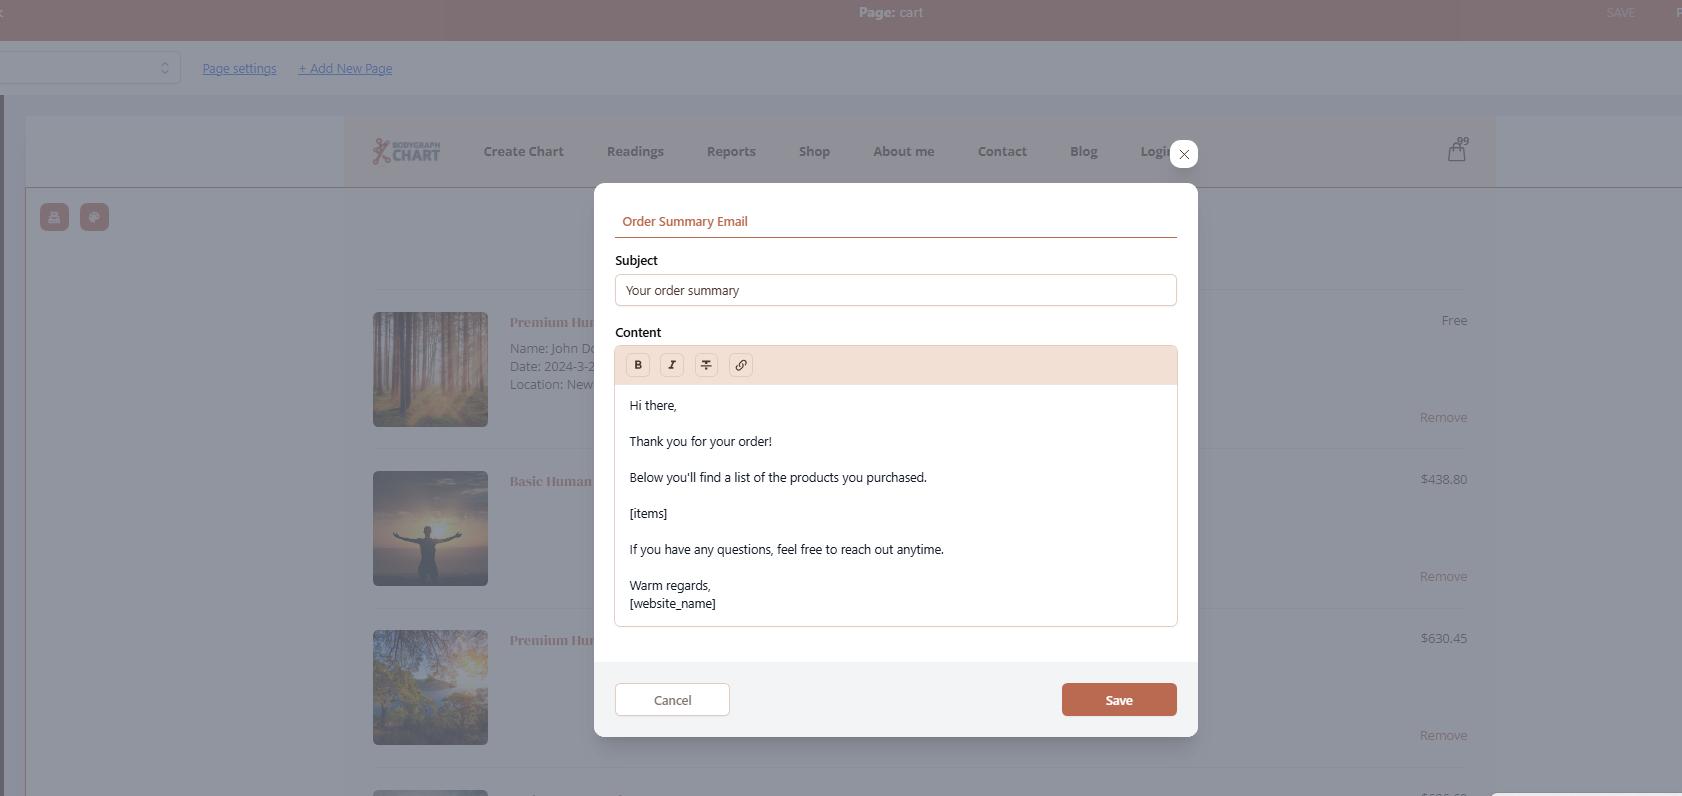
When it comes to order emails and notifications, they can also be edited at the relevant section. For instance if you want to edit the content of report email then navigate to cart page and click on email settings icon.
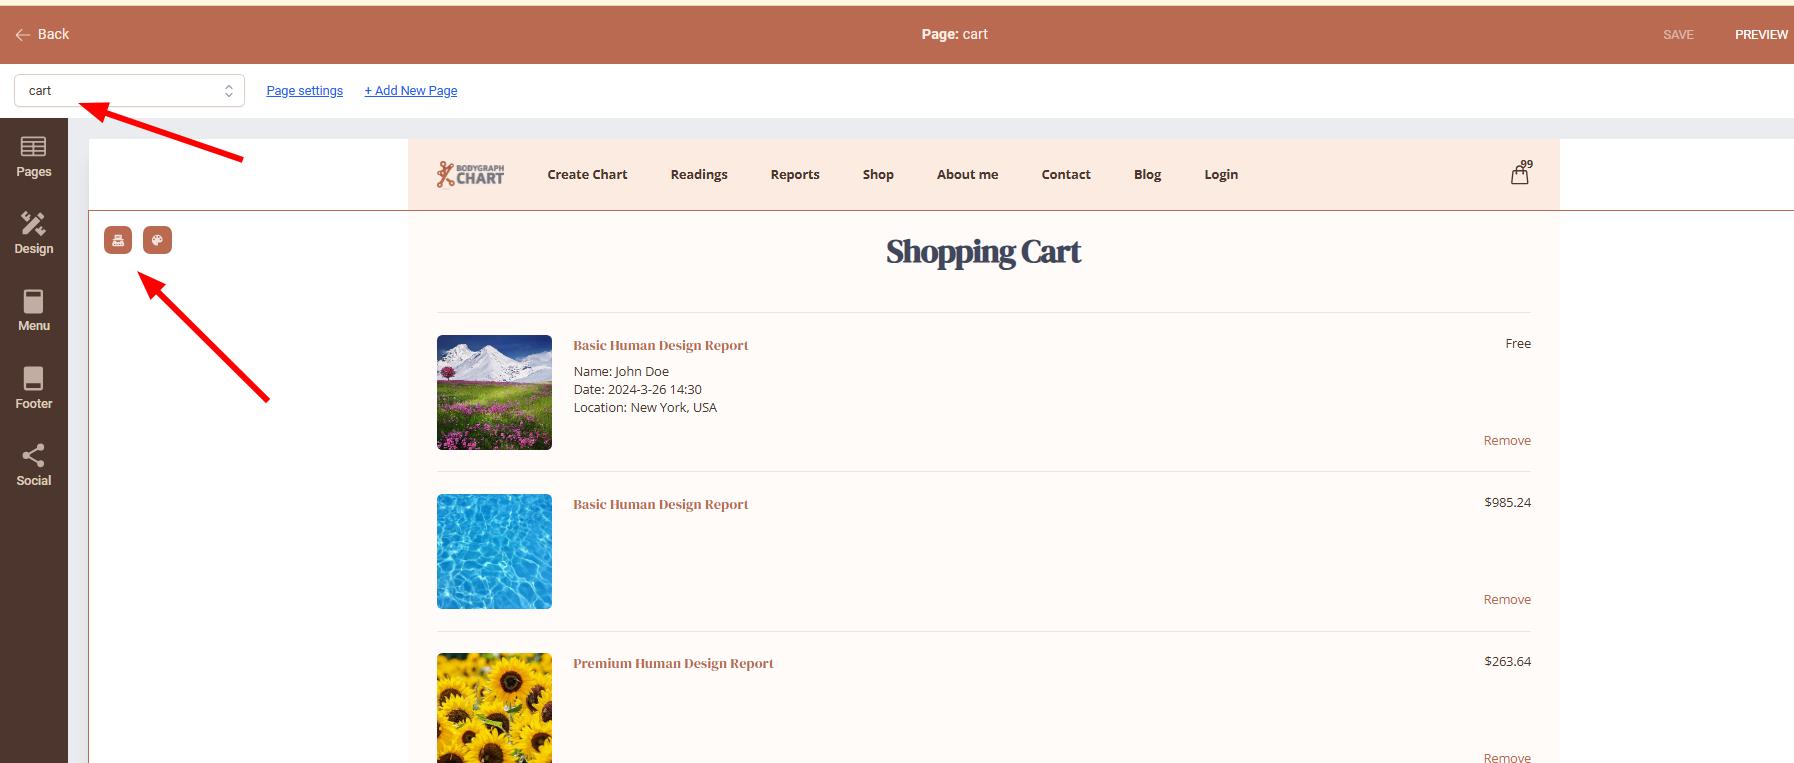
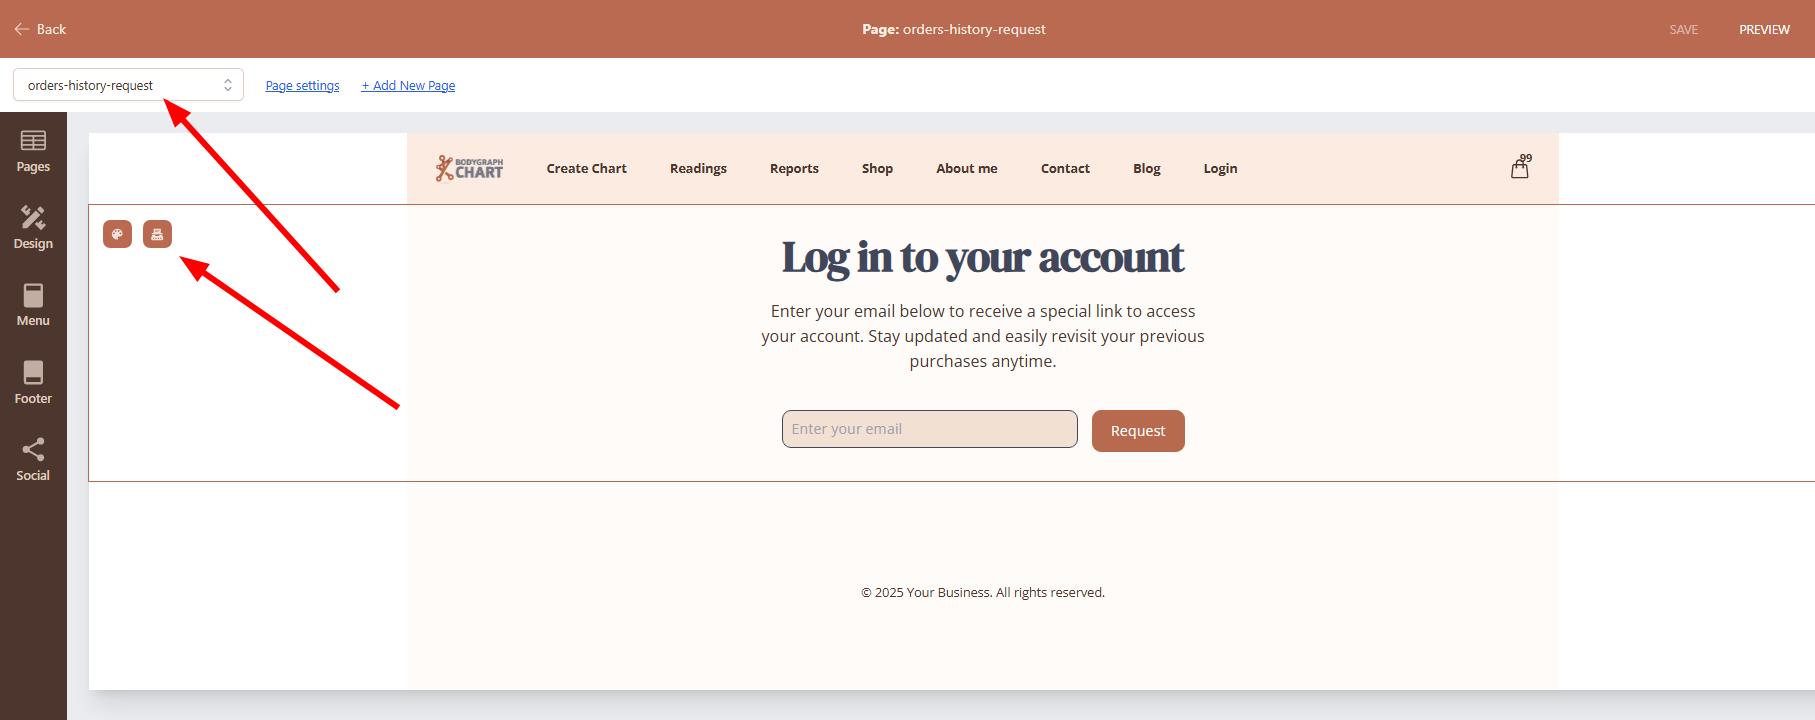
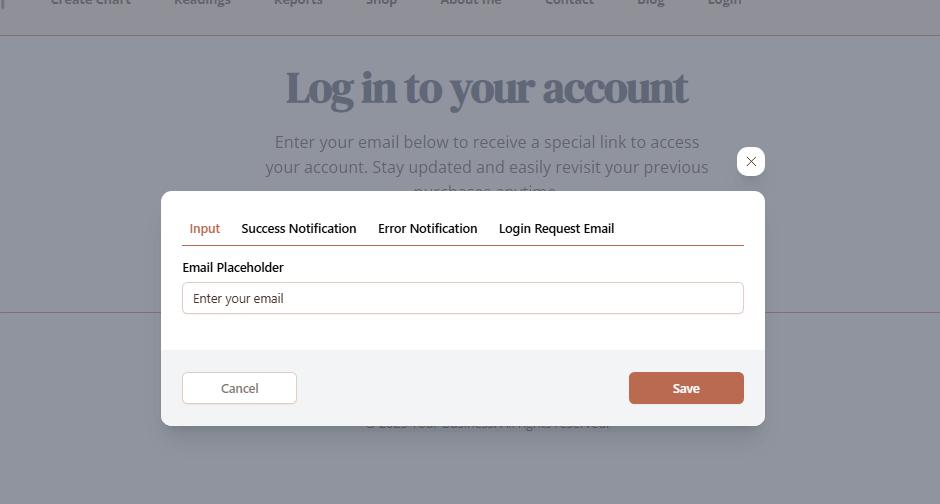
And last but not least, the login emails and notifications are located at Order history request page when editing section settings.
Contact form settings
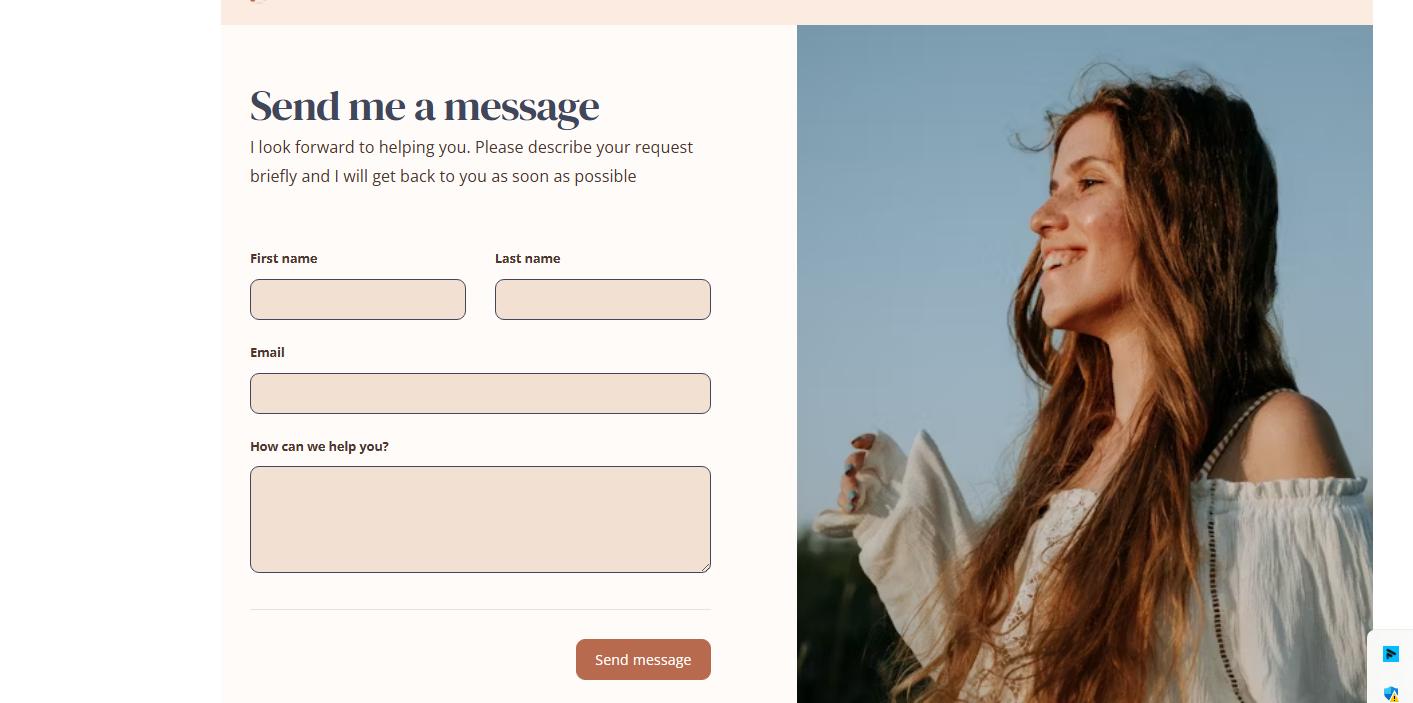
If your website includes Contact form sections, the email notifications will be sent to your Bodygraph account email address every time when someone fills the form.
Best of luck in creating your website!
Still have questions? Please message us on Live Chat or send an email to support@bodygraphchart.com.

