ThriveCart connection
Just pop your question below to get an answer.
ThriveCart connection
To connect ThriveCart app please follow the steps listed below:
1. Login to your Bodygraph Chart account and open My Apps section.

2.Select Payment Apps at the top and click ‘Create new’ button.
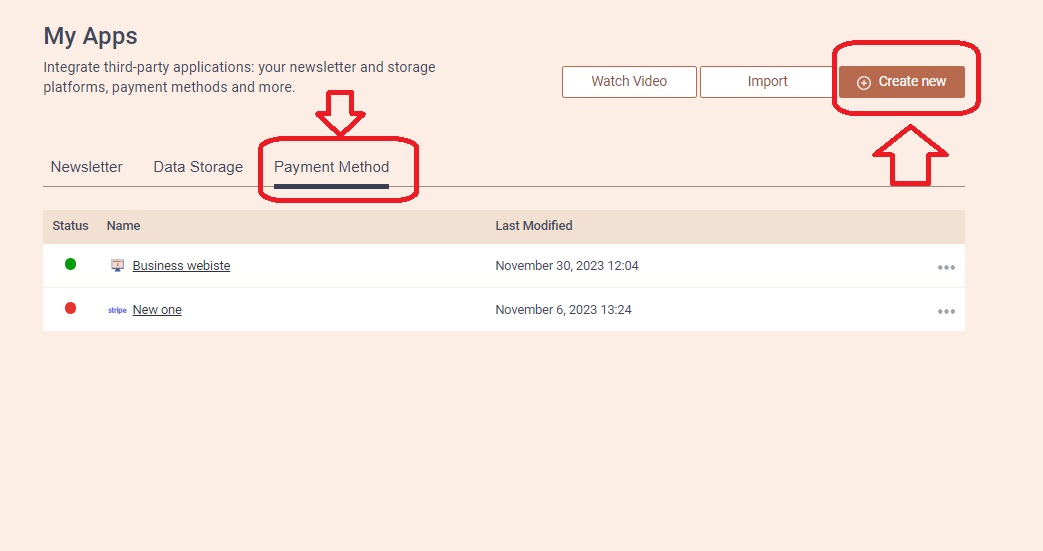
4. Select ThriveCart and click next.

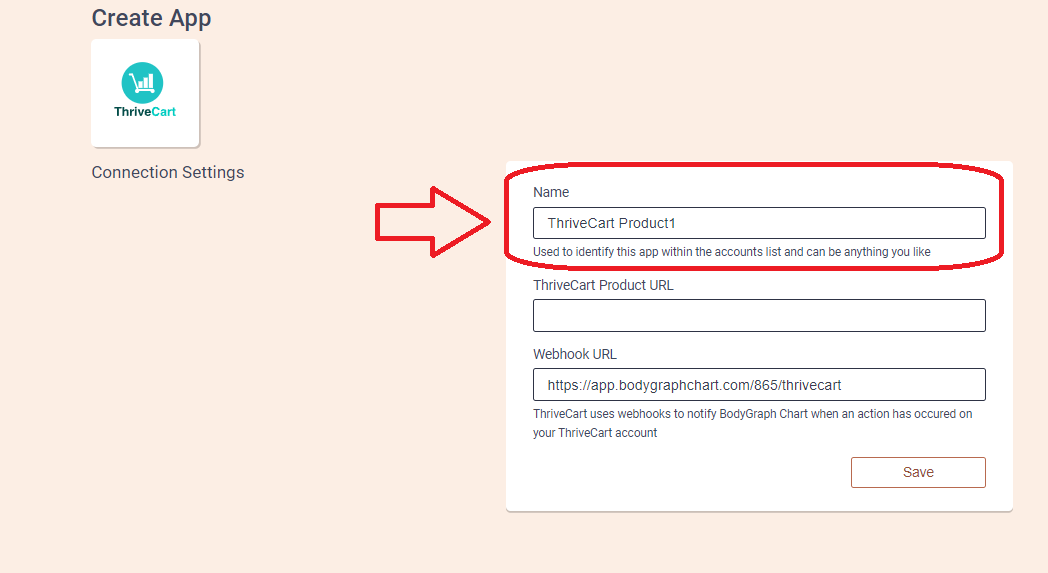
4. Give the connection name (whichever your prefer) and leave this tab open like this.
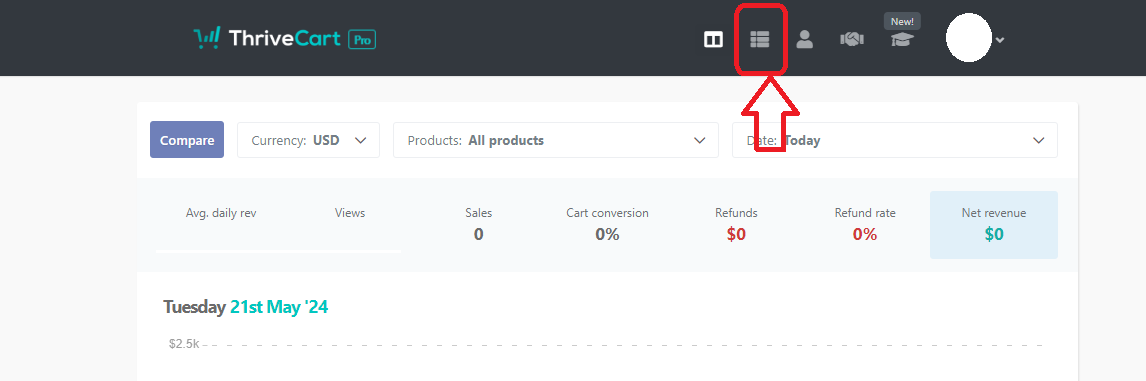
5. On the new tab open your ThriveCart account and login. Once logged in, go to the Products tab.
6. Press ‘Create new product’.
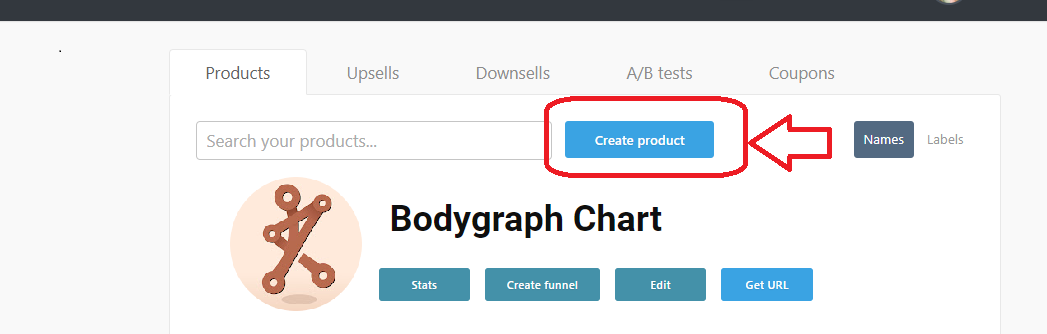
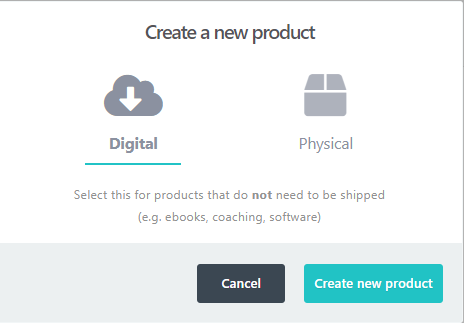
7. Select Digital product type an then Create new product.
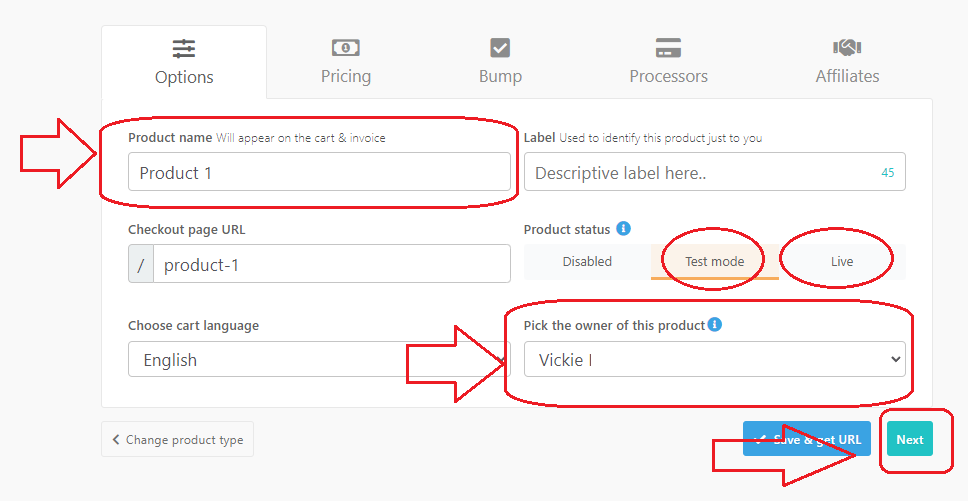
8. At the Options tab input product title, Select owner (yourself) and click next. For testing purposes select Test mode, but switch it to Live mode once you release sales to customers (I use test mode for demonstration purposes).
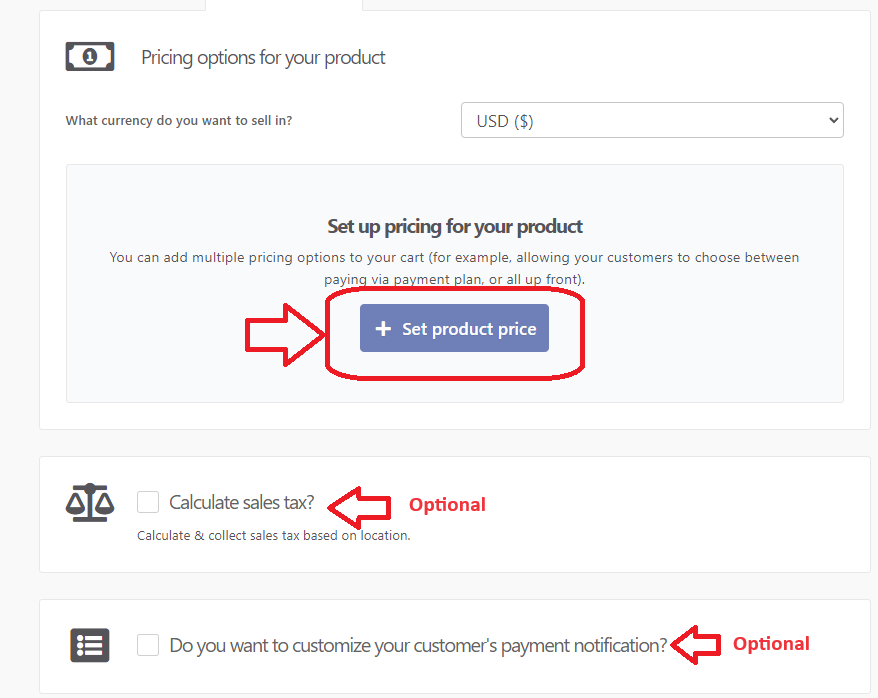
9. On Pricing tab select the currency that and click ‘+Set product price’. Set the price for the product click next and again next. Any other settings are optional.

10. Bump setting is optional so you can click next.
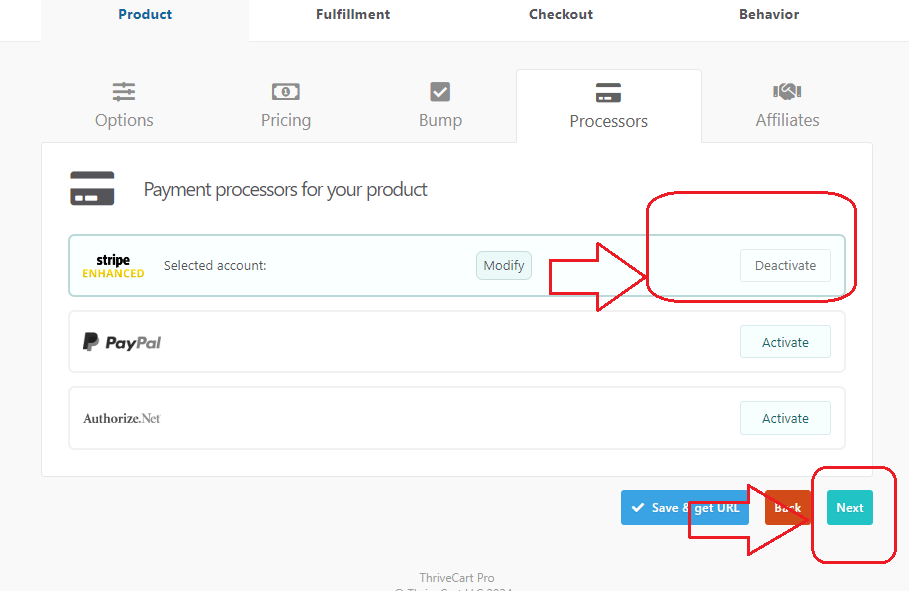
11. At Processors tab select and activate your Payment processor (I am using Stripe in this example).
12. Affiliates tab is optional so you can click next.
13. Provide email where customers can reach if there will be issues with the purchase and select invoice delivery. Invoice and contact details will be sent to customer straight after purchase. Click next.
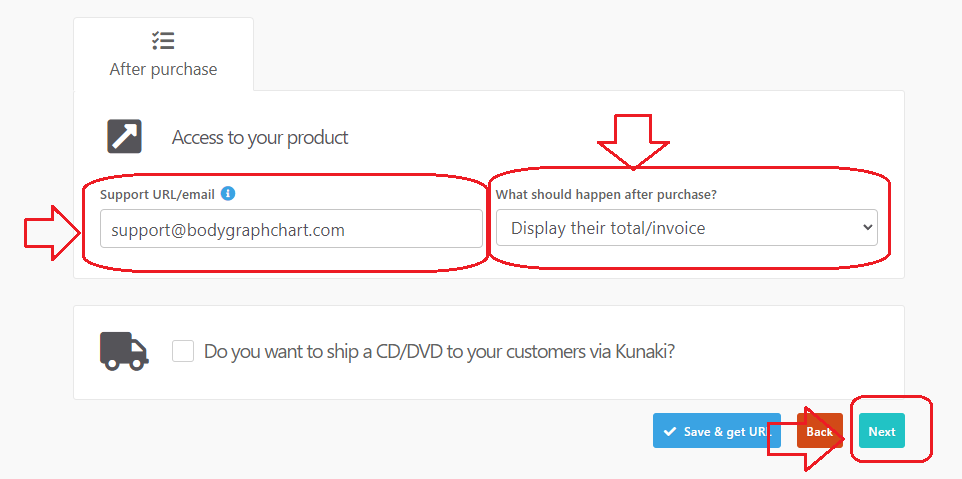
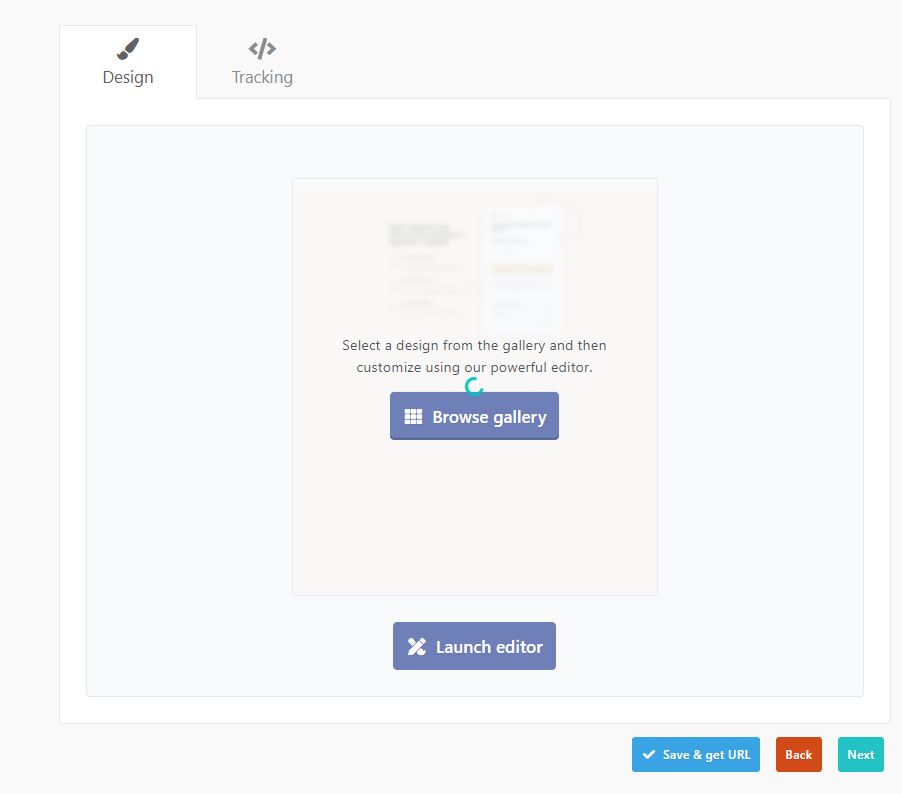
14. At the Design tab Select and customize your checkout page (there a lot templates to choose from). Once design completed click Next. Tracking is optional so you can click next again.
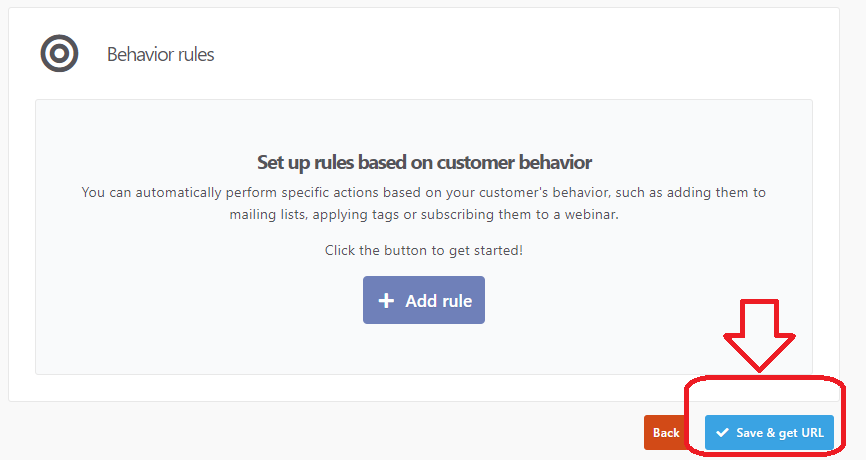
15. You can set up behavioral rules, but this is optional. Clisck Save and get URL.
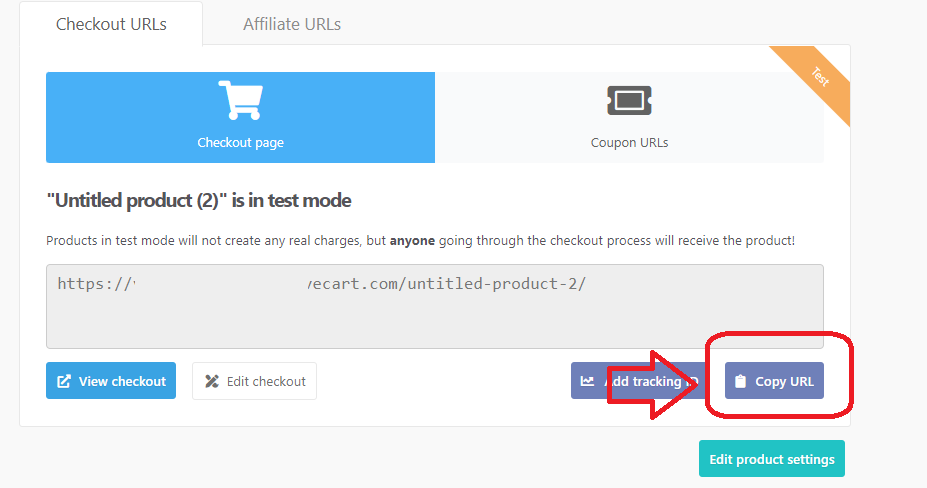
16. Copy product URL and head back to Bodygraph Chart account where you left set up open.
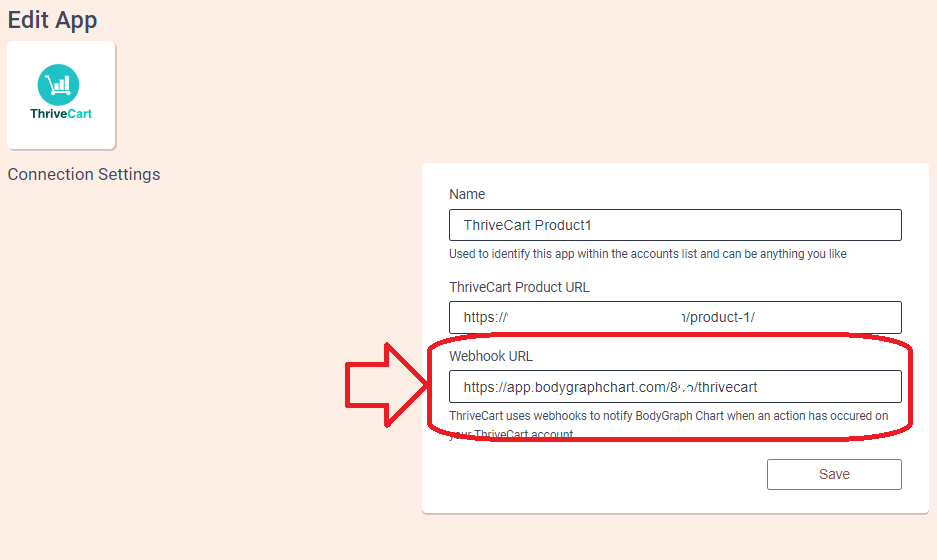
17. Paste URL into ThriveCart Product URL field and click Save.

18. Copy Webhook URL and head back to ThriveCart tab.
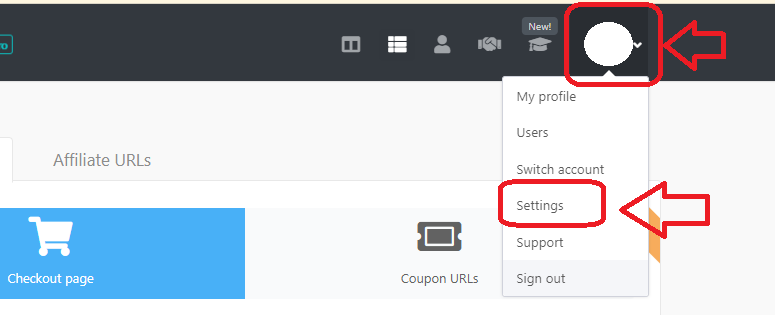
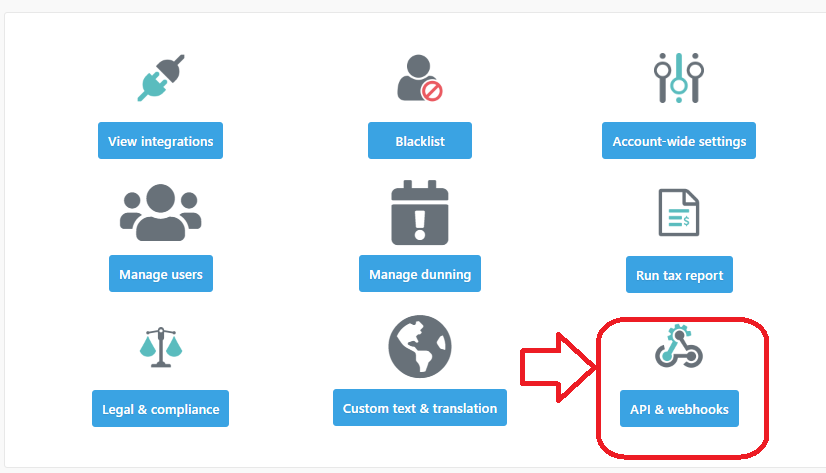
19. Click on your profile icon at the top right corner and select Settings. From Settings options select API&Webhooks. Then select Webhooks&Notifications.
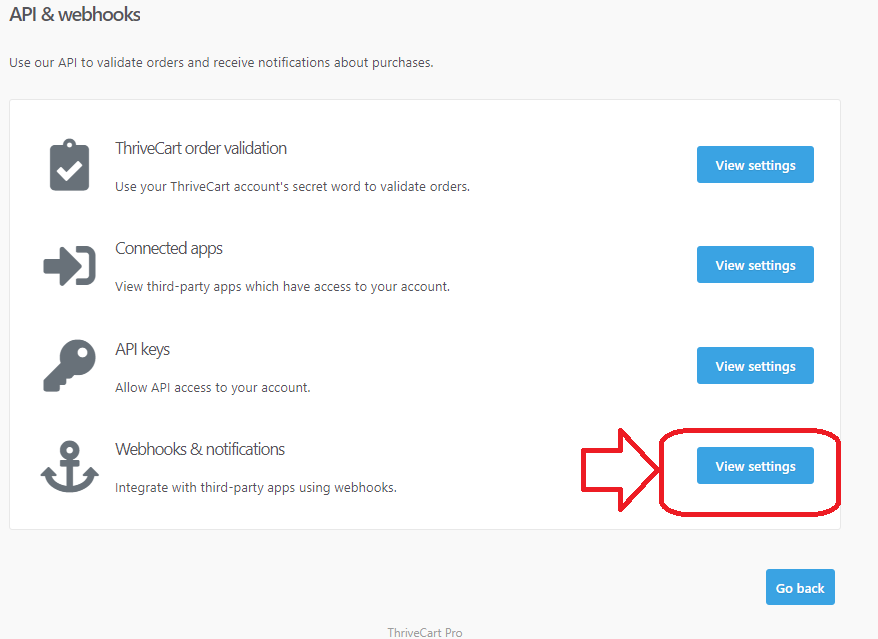
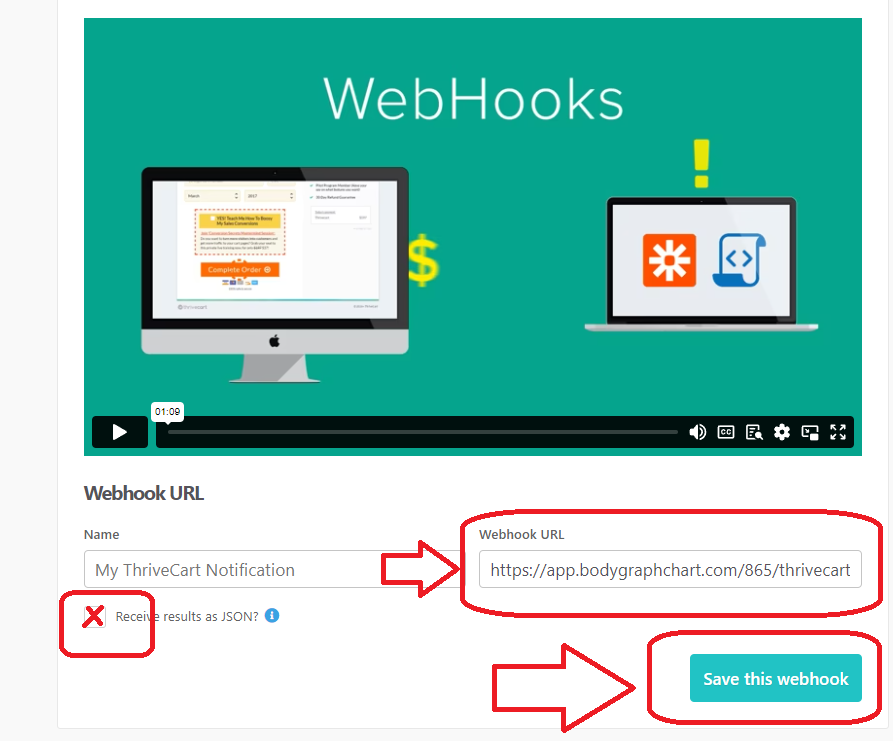
20. Click View Settings. You can give the name to identify this URL, paste the URL from Bodygraph Chart setup (you copied that earlier), tick ‘Receive results as JSON and Save this Webhook.
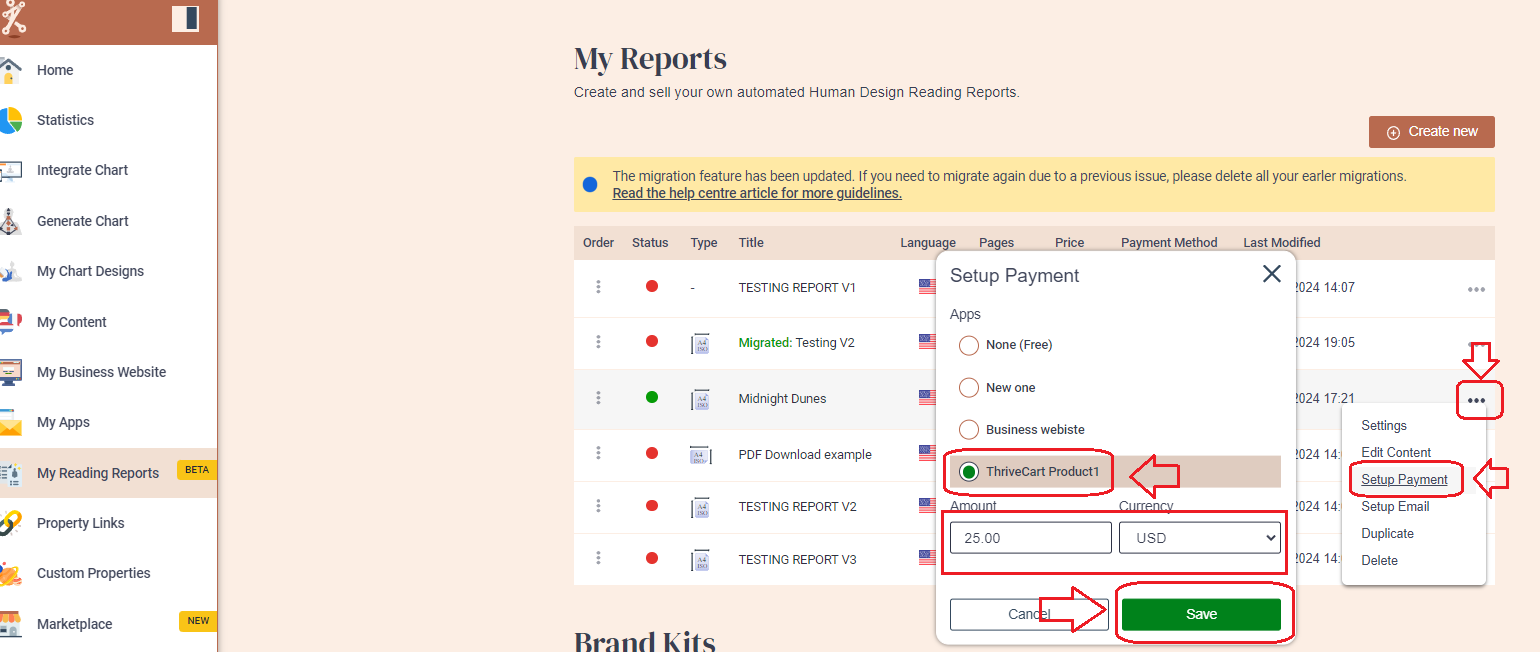
21.Now go back to Bodygraph Chart account, Reading reports section. Select 3 little dots next to the report that you want to sell and select Setup Payment. Select Thrive Cart connection, give exact price that you set at Thrive and select same currency. Click ‘Save’.
22. Click again on 3 little dots and then Setup email. Select our domain and input business or private name and click Save. You can also set up your own domain: Guidance here.

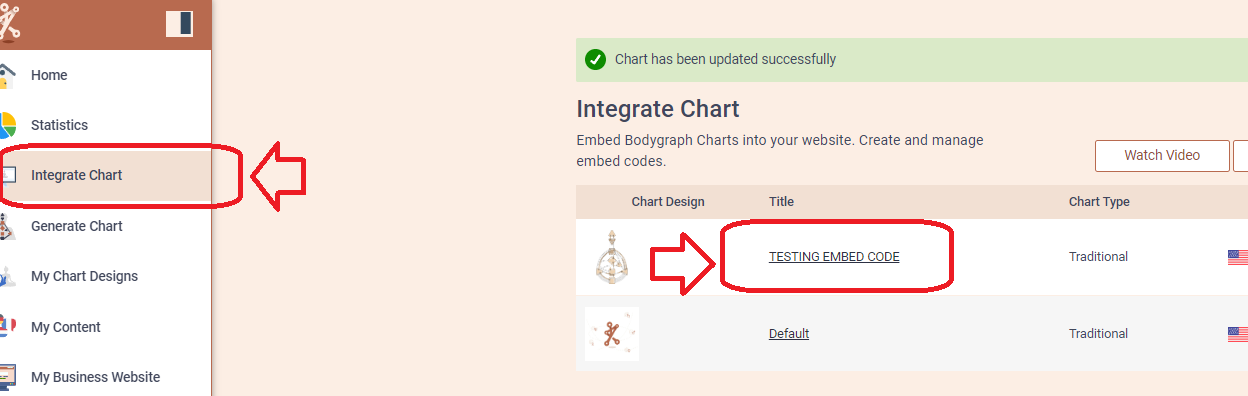
23. Now ho to Integrate chart and open embed code that you are using at your website. Enable the report that you just set up and click Save changes.
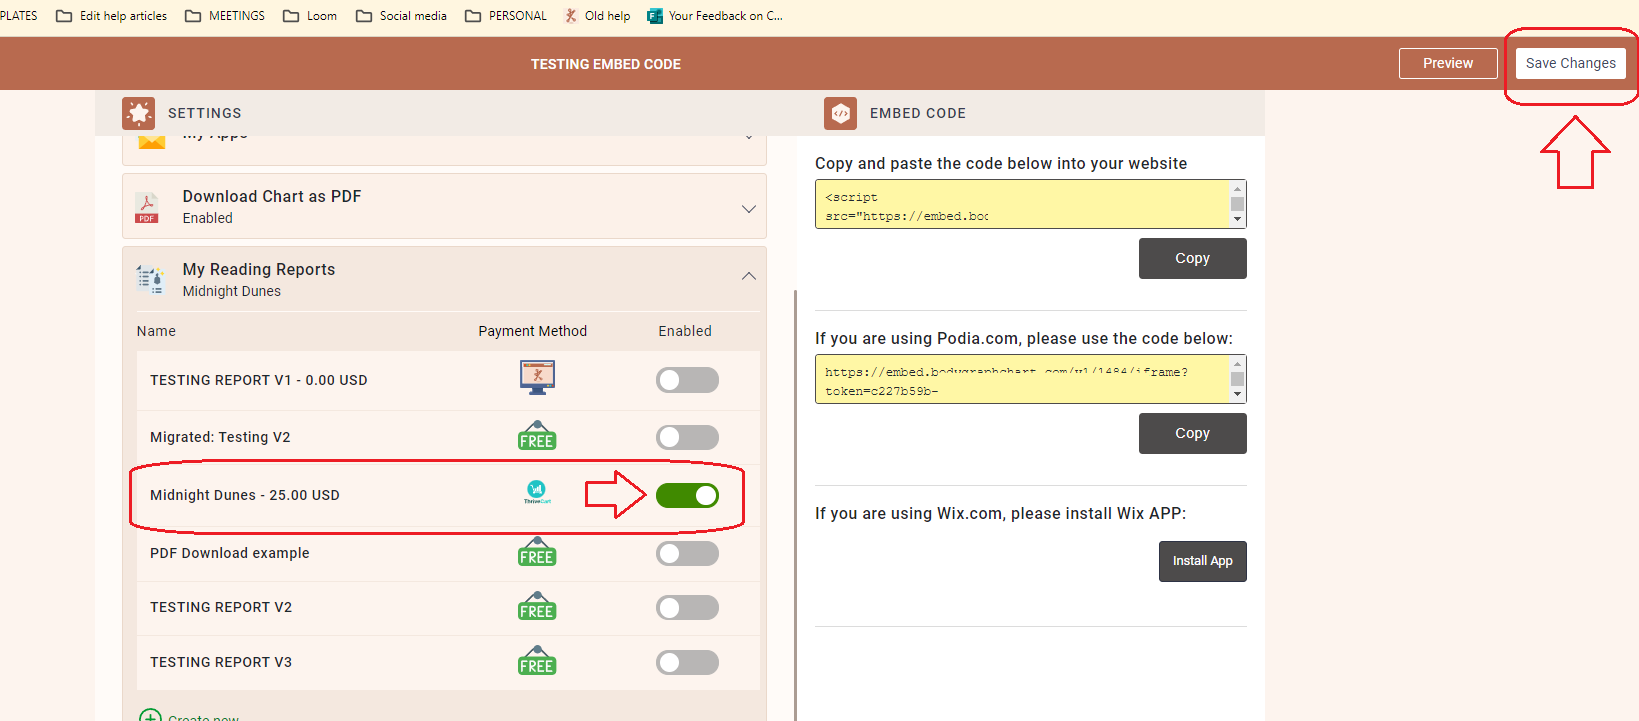
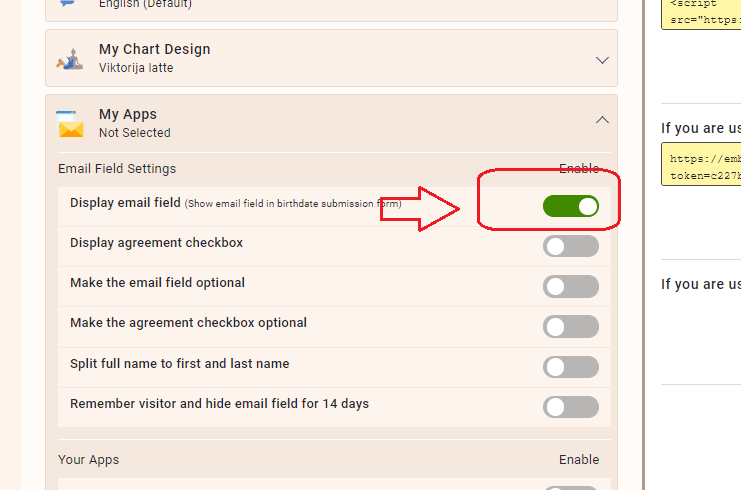
24.At the embed code, enable email field (required for Thrive payments) if not yet enabled and click save changes.
25.Now go to your website and test the purchase and email delivery. Remember if you selected test mode you can input false card details. But if you selected live mode then you will need to pay and provide your existing card details.
25. You can edit your email delivery content following this guide.
NOTE: You will need to repeat this set up for each product separately.
Still have questions? Please message us on Live Chat or send an email to [email protected].
