Zapier app connection
Just pop your question below to get an answer.
Zapier app connection
Create an Zapier app account.
Set up App connection
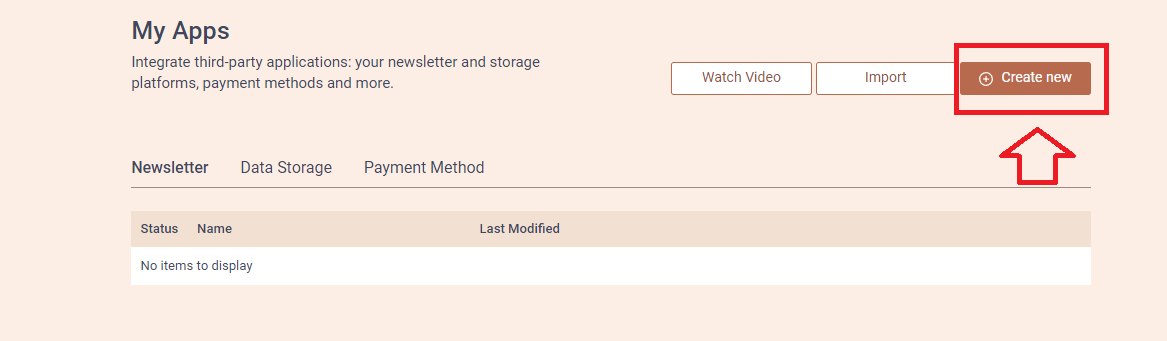
1. Login to your Bodygraph Chart account and open My Apps section.

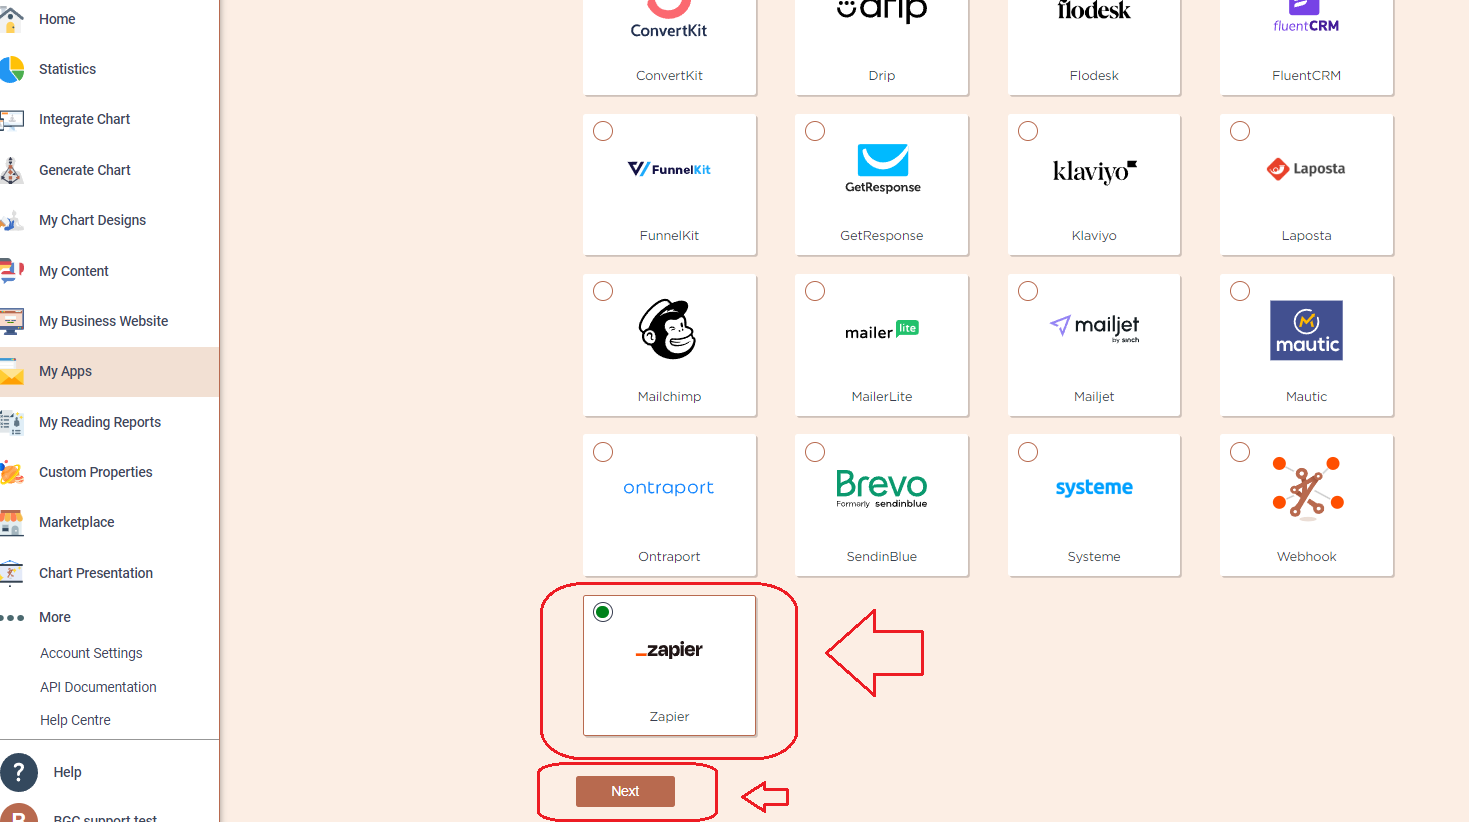
2. Press ‘Create new’ button and select Zapier app from the following options, then click ‘Next’.
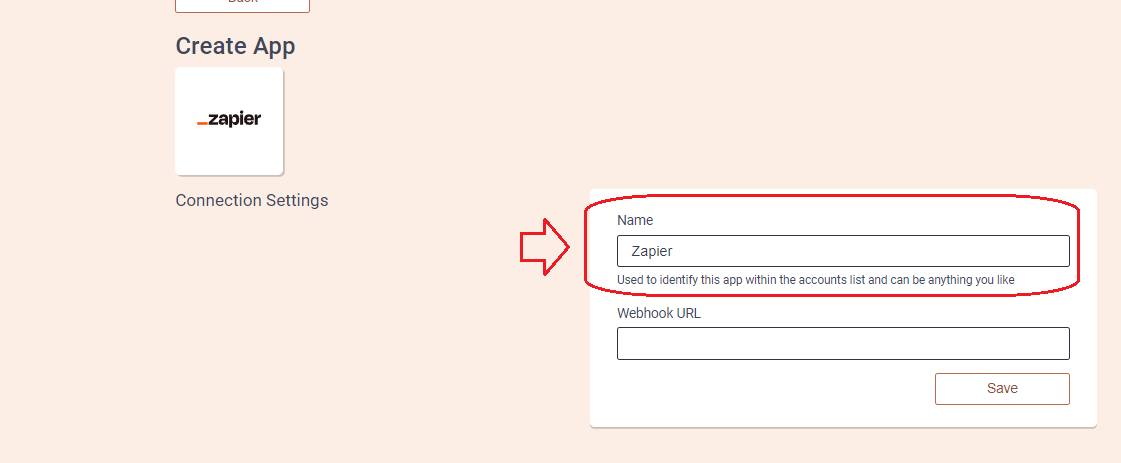
3. Add the Name (it can be anything you like) and head to the new tab to get to start your Zapier app set up.
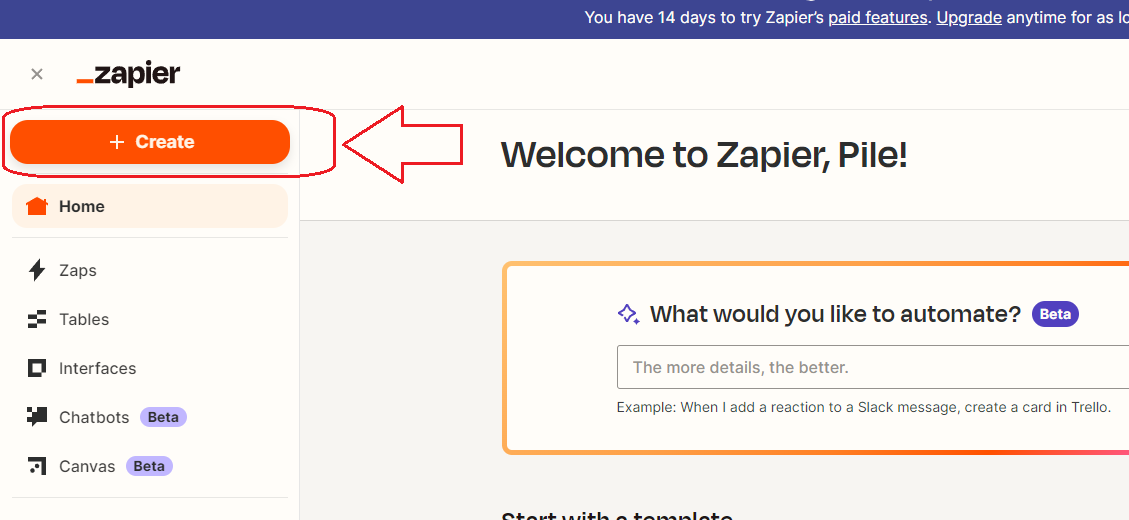
4. On the new tab open your Zapier app account. Click on ‘+Create’ button on the top left corner and select Zaps option.
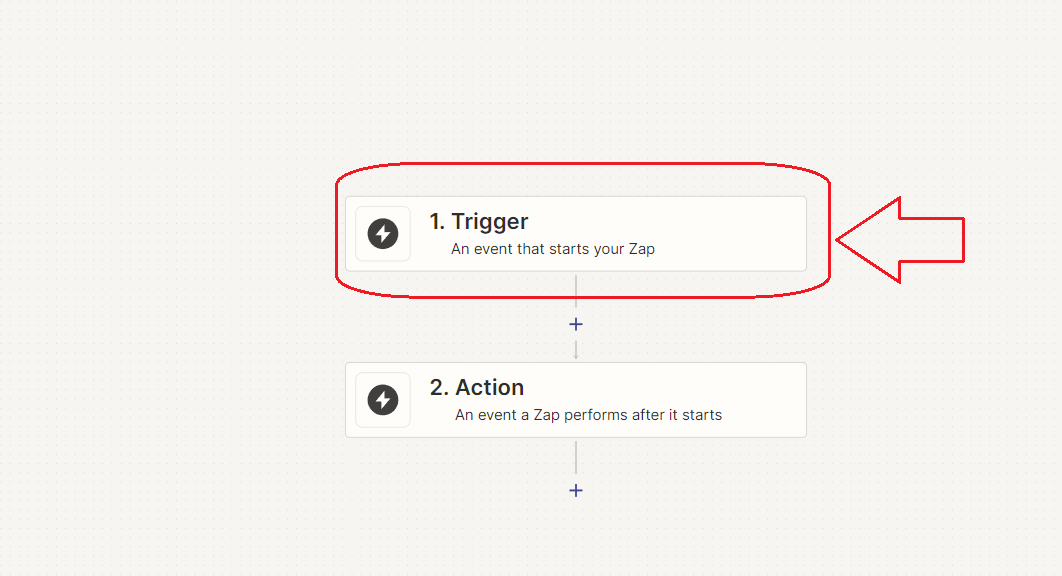
5.Click on Trigger at Zap editor window.
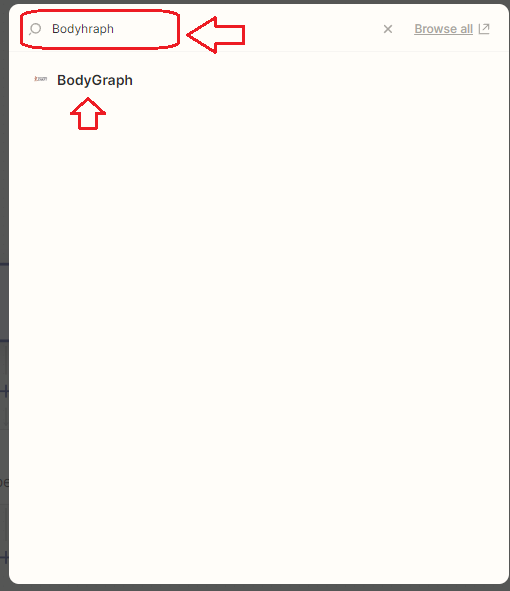
6.In the search field of the pop-up window, type “Bodygraph. Select the Bodygraph that is found on the list.
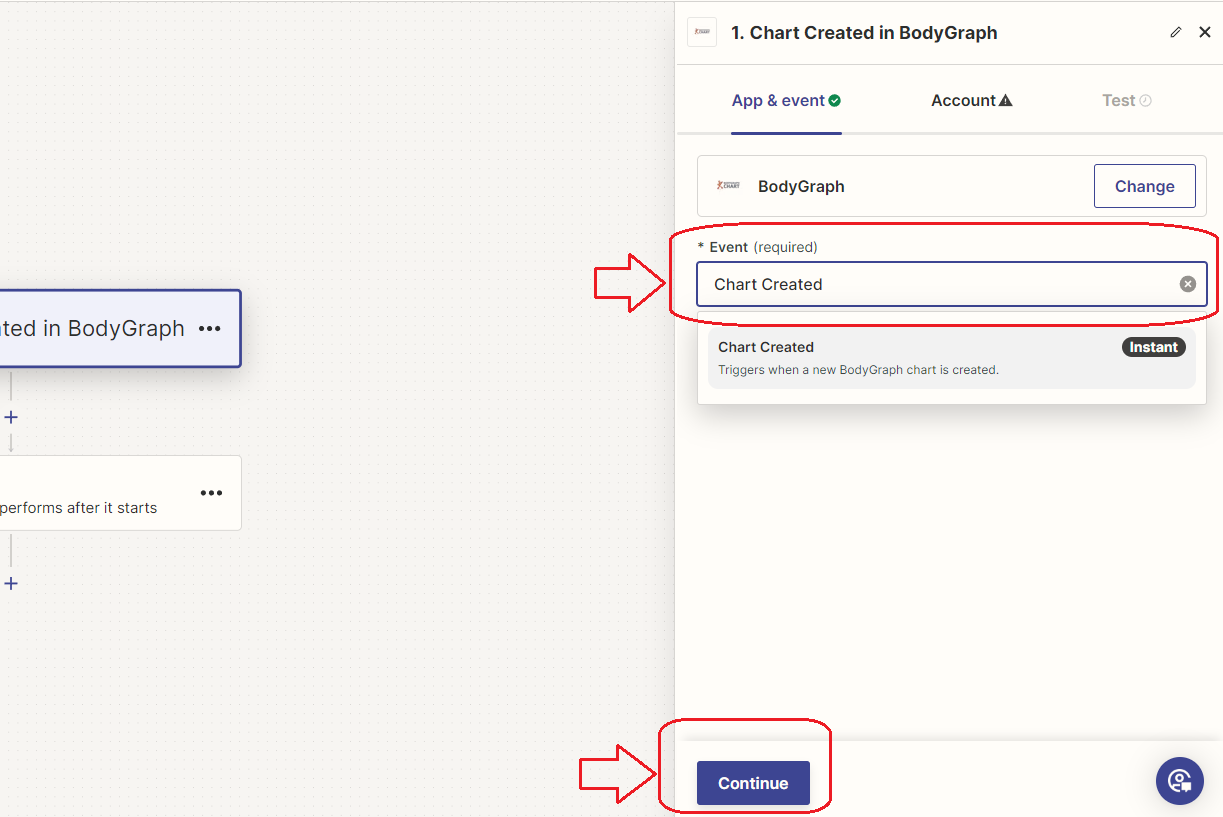
7. On the right taskbar, select Chart created at the Event field and then click continue at the bottom.
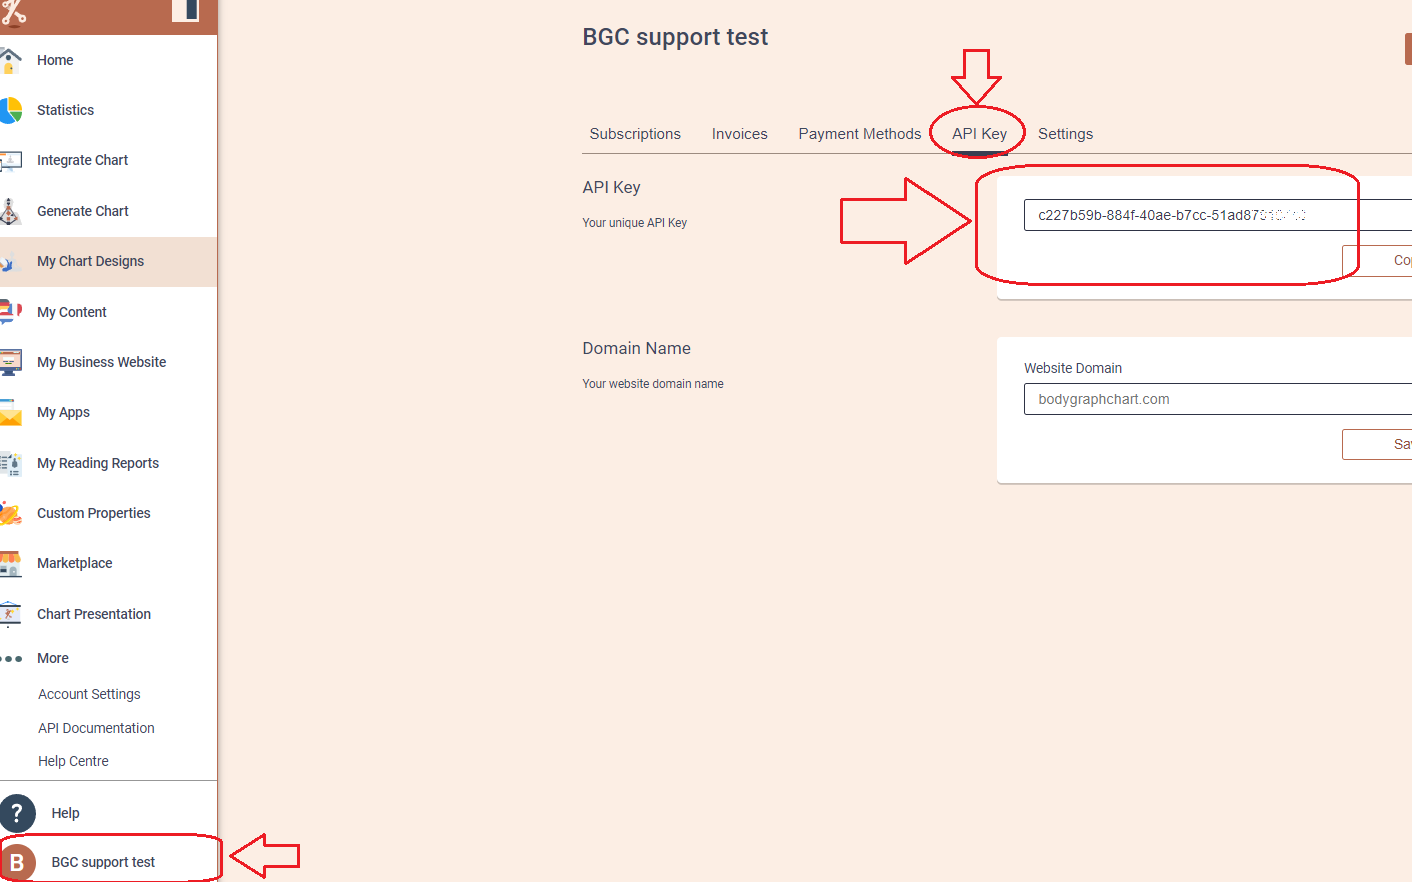
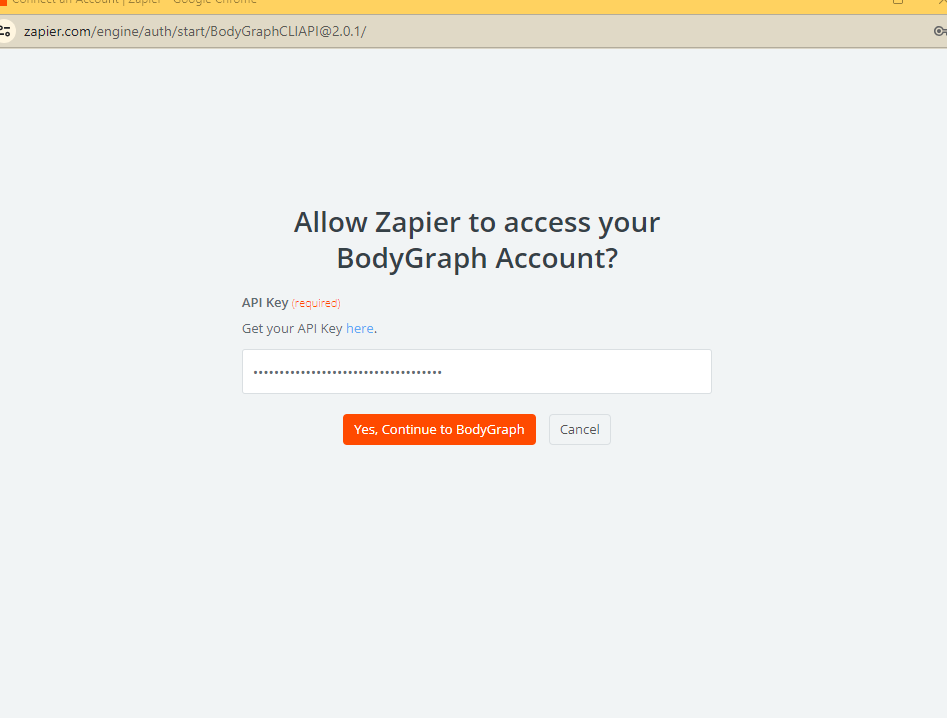
8. On different tab open and login to your Bodygraph Chart account and copy you API Key.
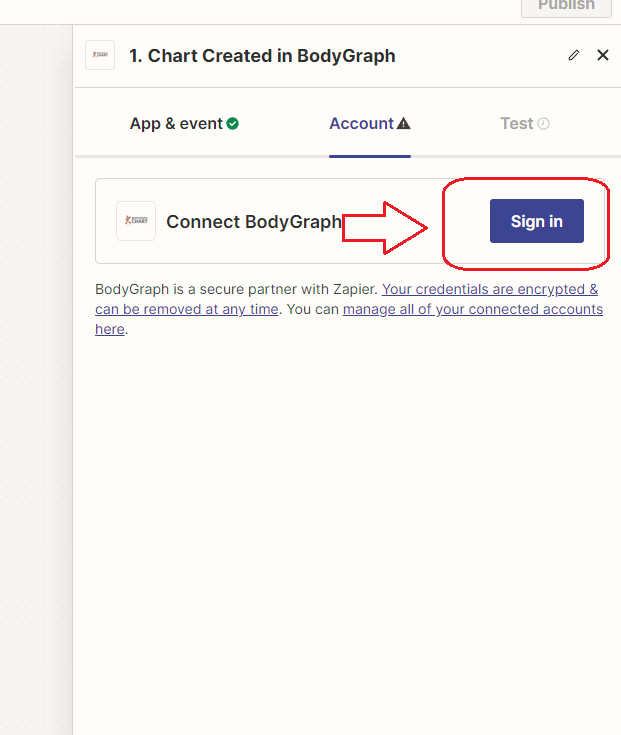
9. Go back to Zapier tab, Click Sign in and paste API key into the field. Click continue.
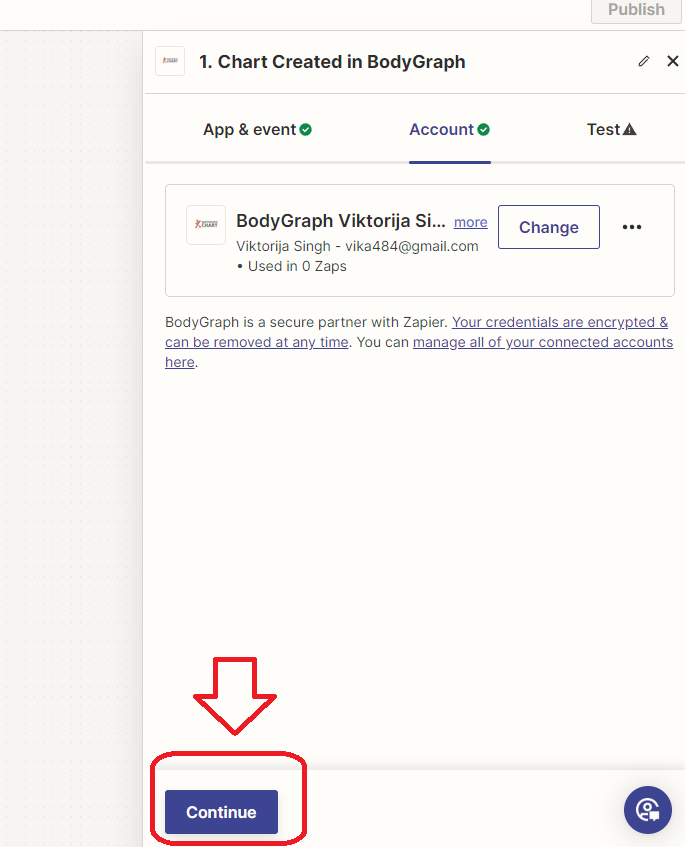
10. Click continue at the right sidebar.
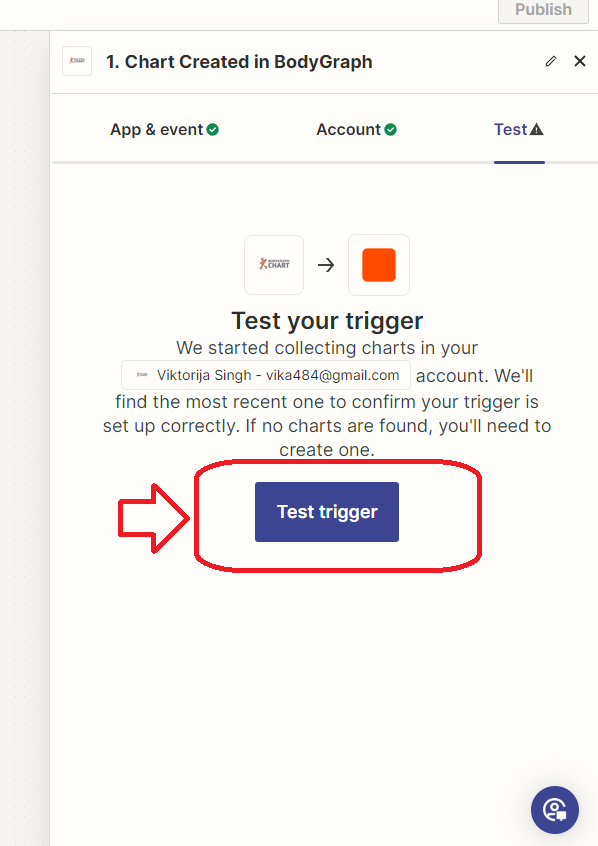
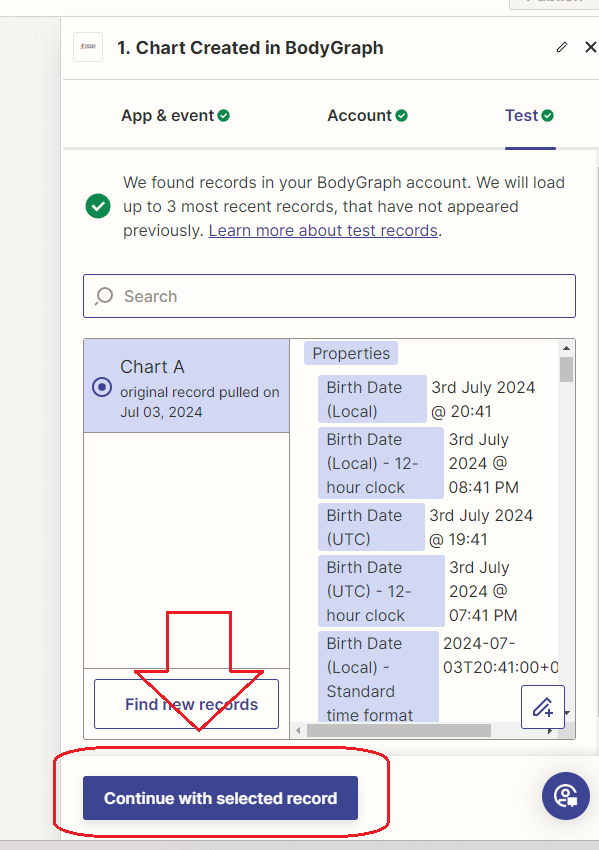
11. Click Test trigger button.
12. Click ‘Continue with selected record’.
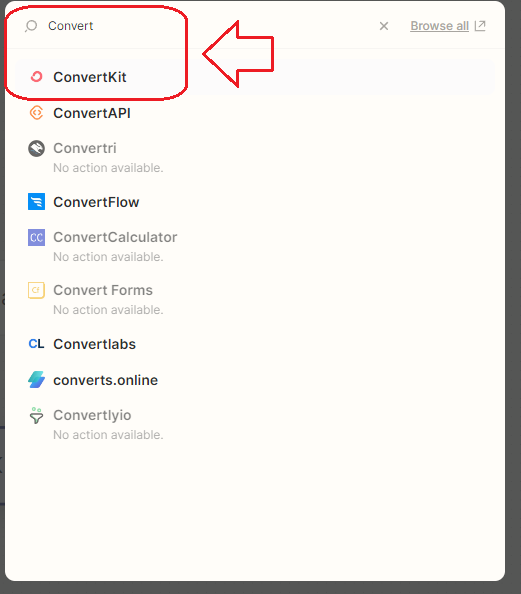
12. Now actions window will pop up. Search the app that you want to make connection with. I will use Flodesk just as example (we have Flodesk direct integration). But you can select other app that we have no integrations with such as Smaily, Kajabi, etc. Full list of possible integrations can be found here.
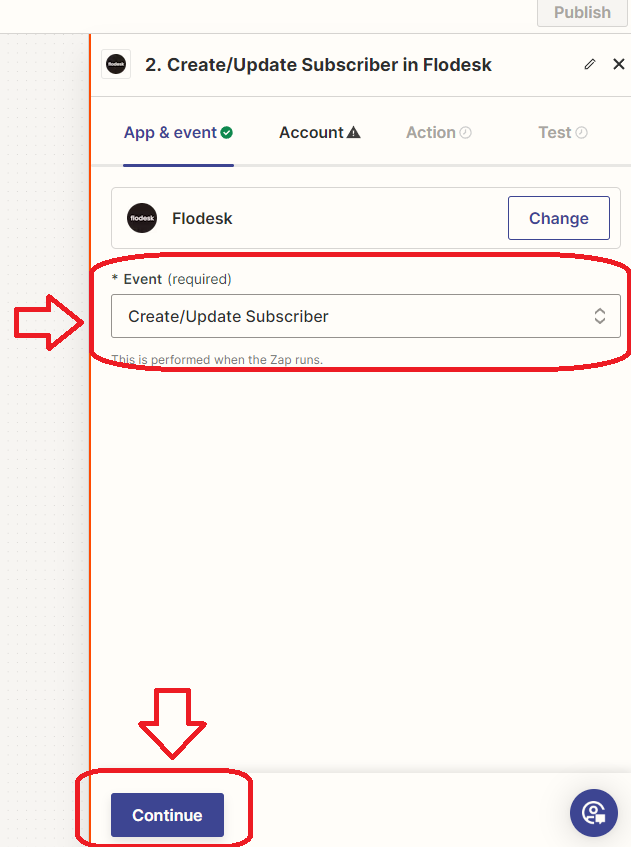
13. At the Event field on the right sidebar select Create/Update subscriber and then click Continue.
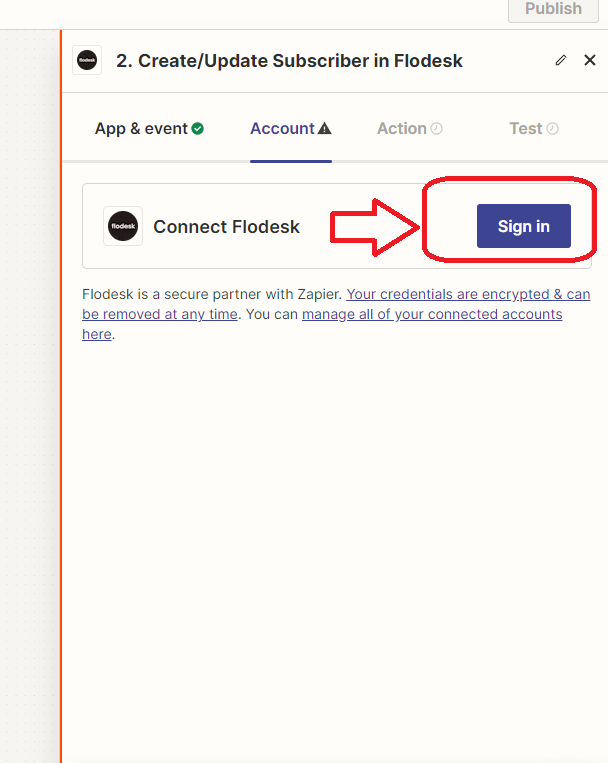
14. Click Sign in and provide your selected app login credentials.
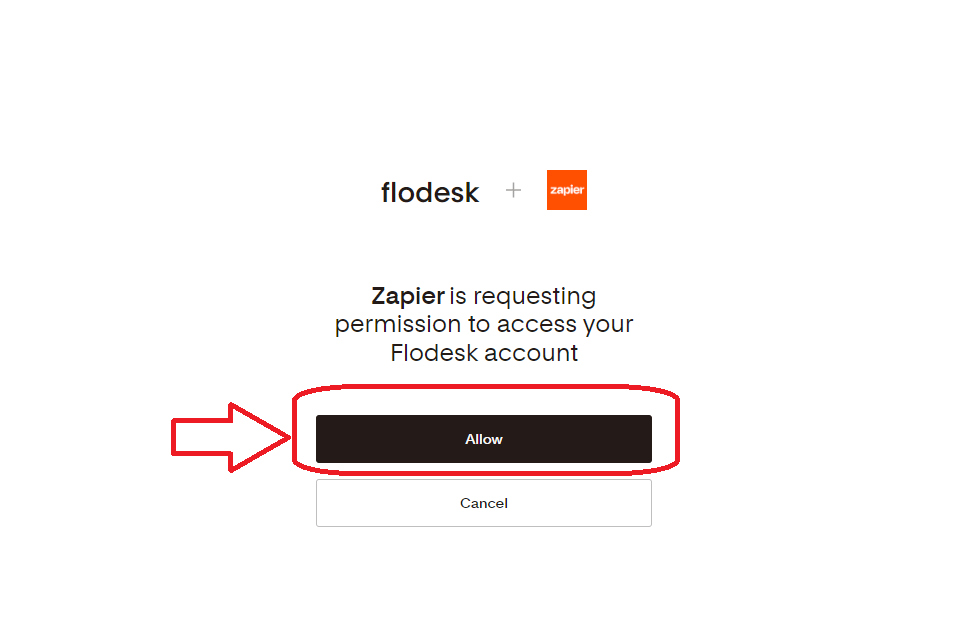
15. Click Allow Zapier to access your app.
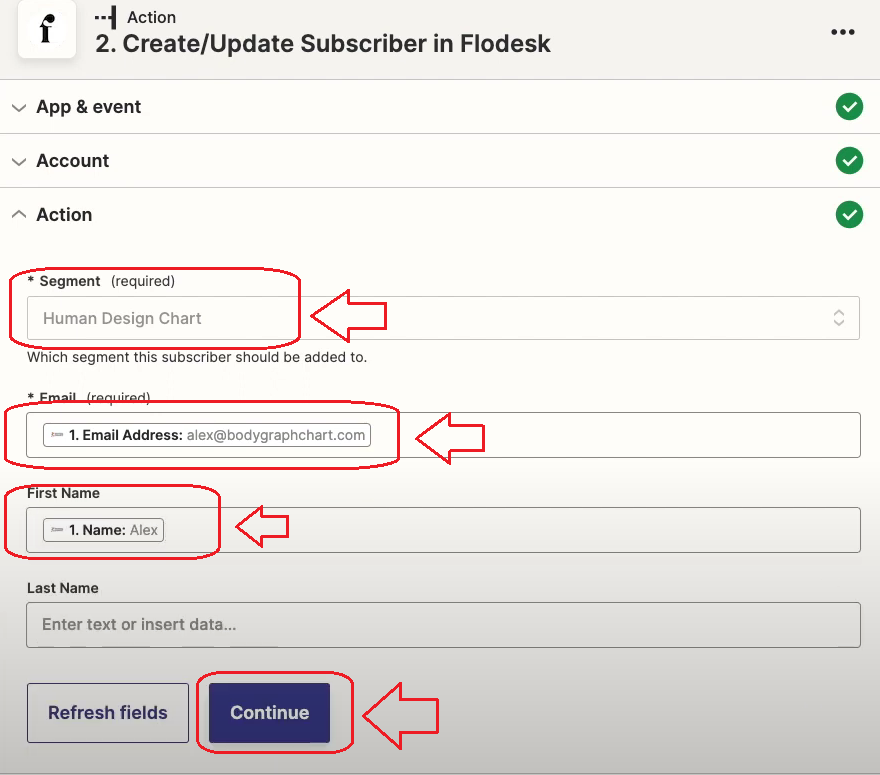
16. At the action taskbar select Segment (this is the segment, group or form name that you have to create at your Newsletter app), Email field as Email address:alex@bodygraphchart.com, and Name field as Name: Alex. Click Continue.
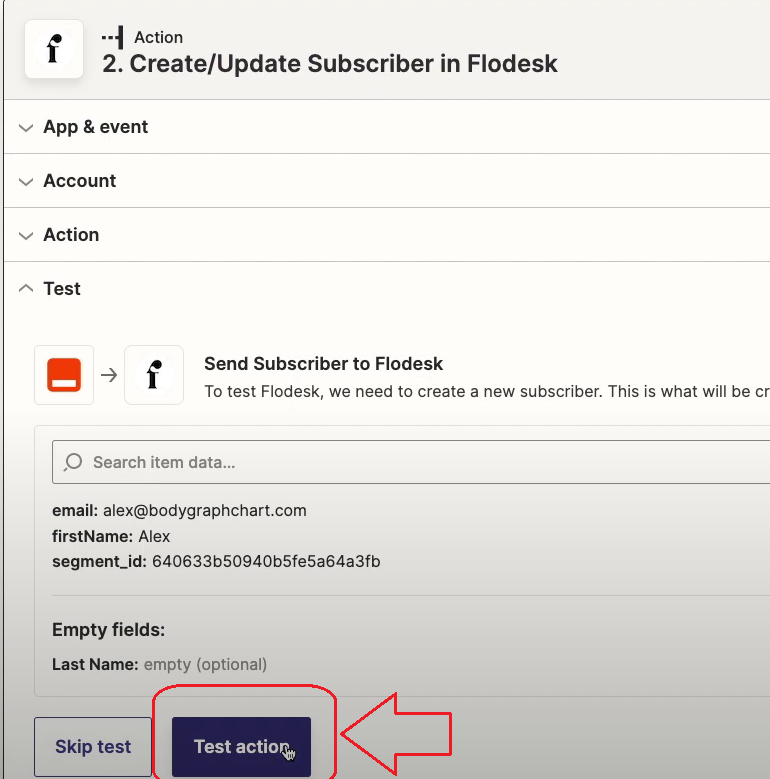
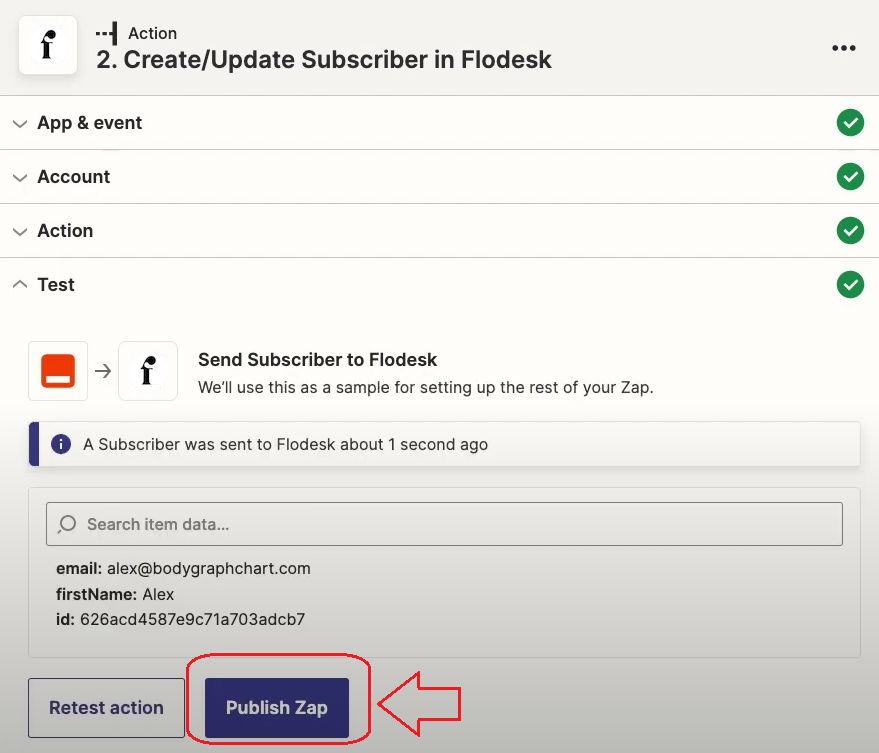
16. Click Test Action button. Then when test is successful click Publish Zap.
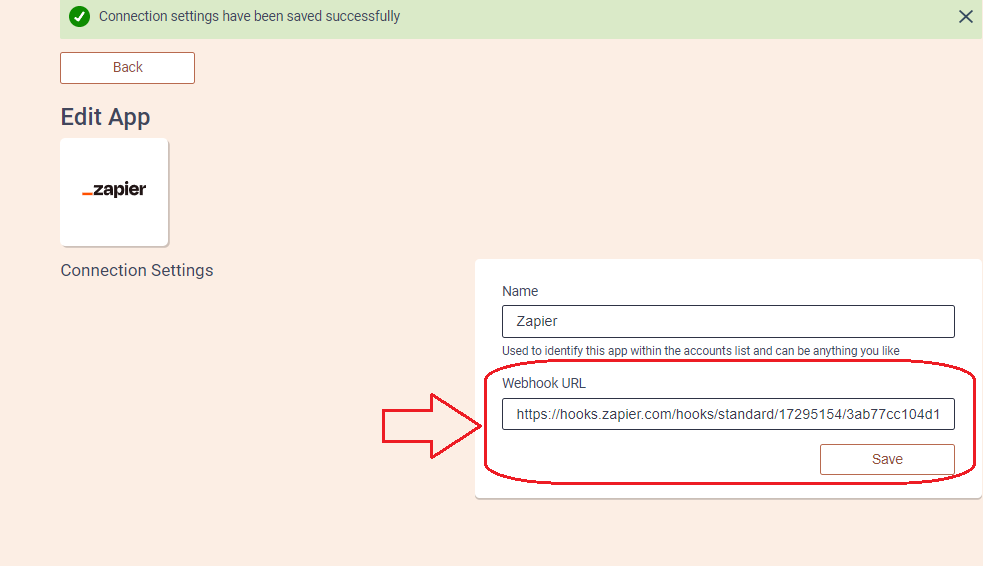
17. Check your email address that you have Zapier app registered with. You should have received Zapier email with Webhook URL. Copy it and paste it back to Bodygraph Chart account where we left Zapier set up opened. Click Save.

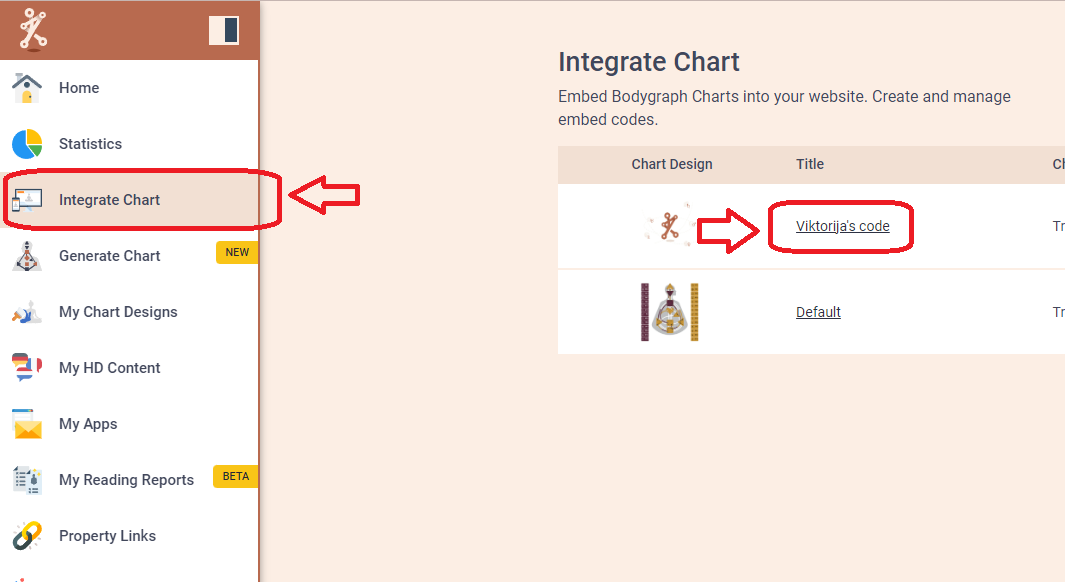
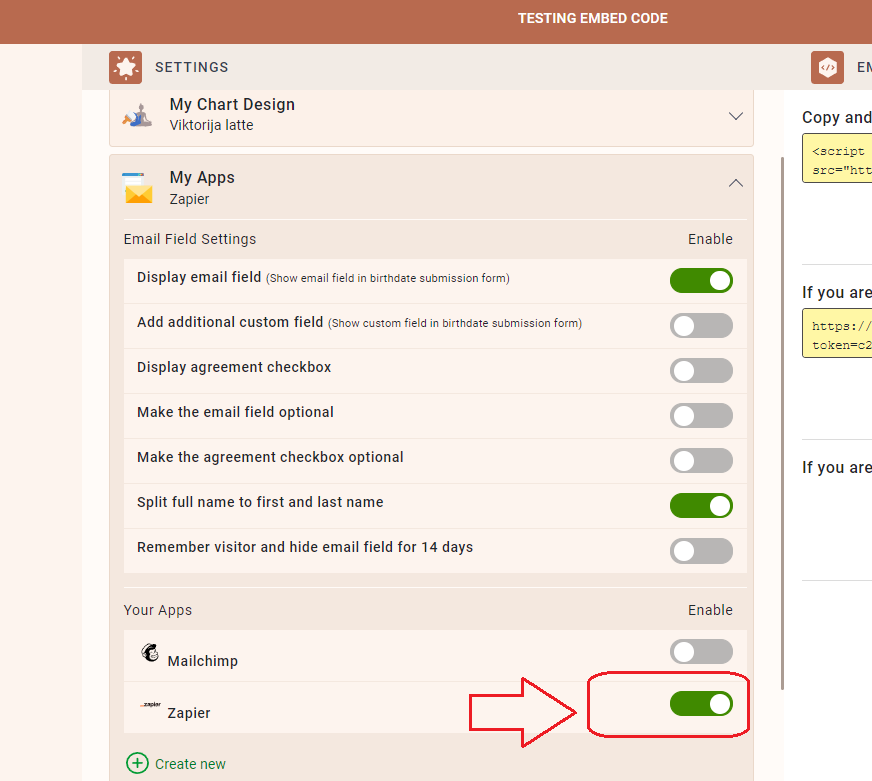
18. Go back to Bodygraph Chart account, then to Integrate chart, select the embed code that you are using/will use on your website and enable Zapier app at My Apps section, click ‘Save Changes’.
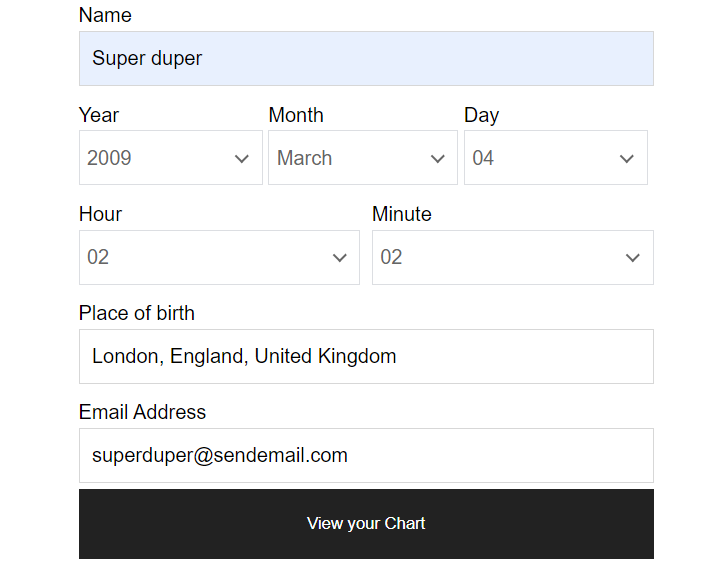
19. Final step is to test if the connection works successfully. Go to your website or Preview mode and submit the form to generate chart (preferably with email address that is not on your subscribers list already). Then go back to your newsletter apps contacts dashboard (refresh the page) to see if the data was collected successfully. All done!
Still have questions? Please message us on Live Chat or send an email to support@bodygraphchart.com.
